
Where’s the SPICE? Making A Custom 3D Printed Spice Rack
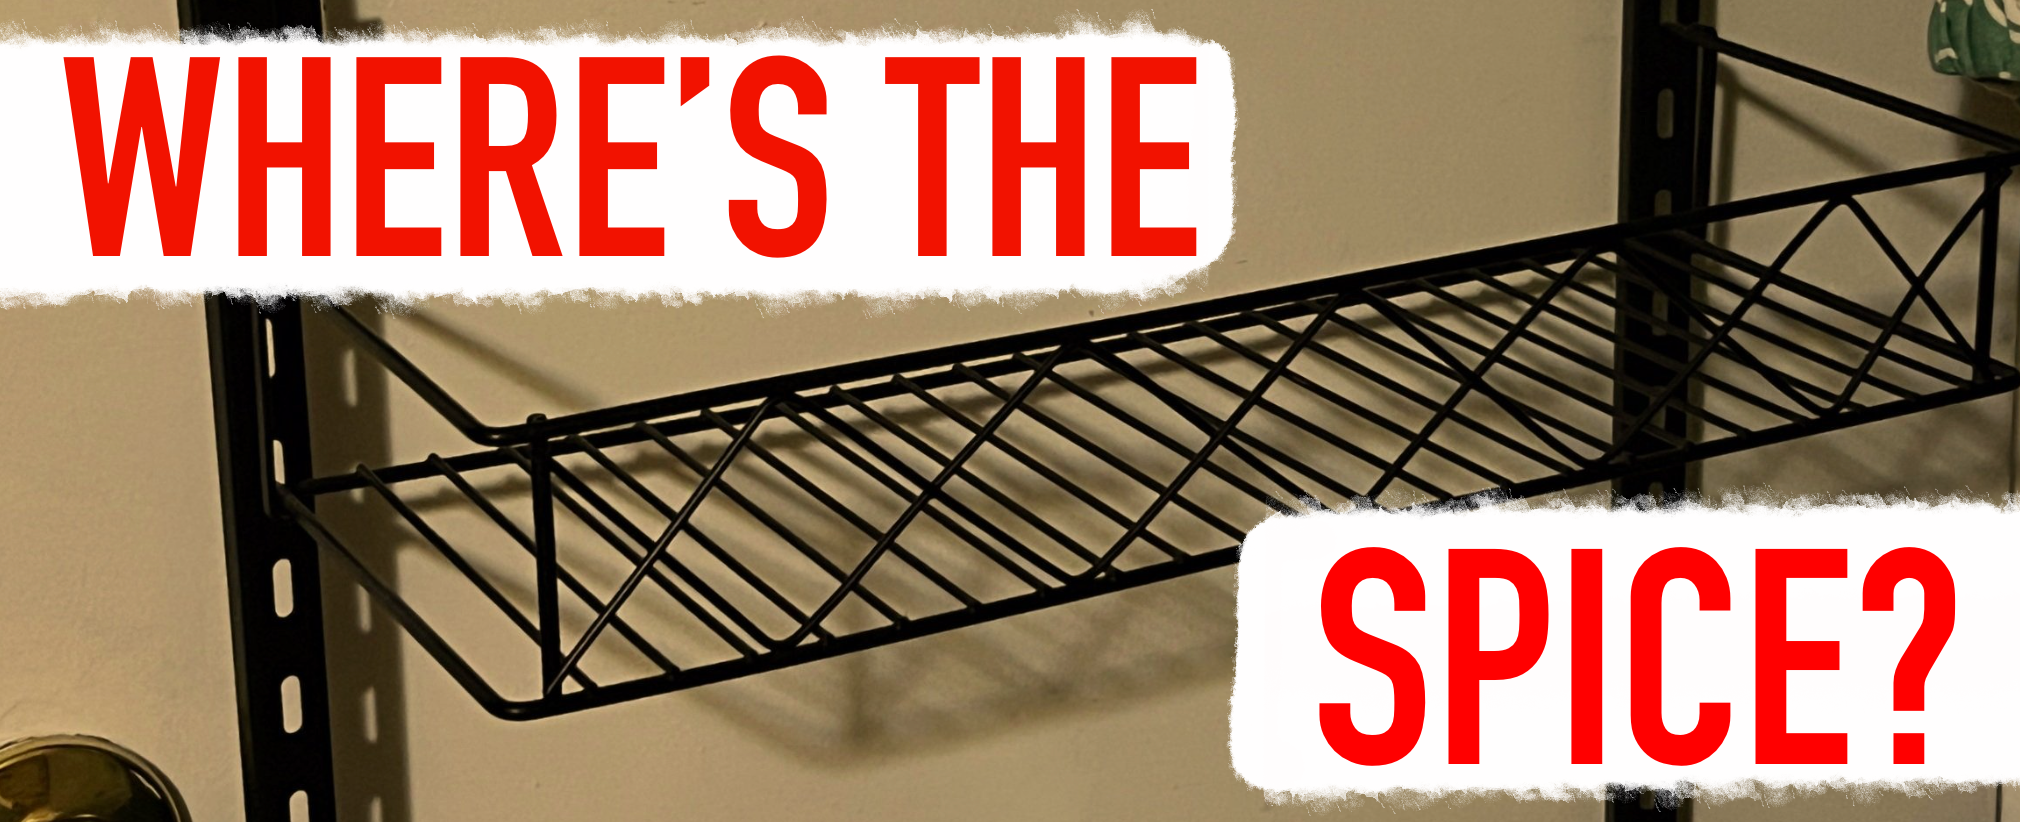
“Where’s the Spice??” - A question I often ask myself every day cooking. Not having a dedicated storage place for my spices adds irritation to my daily routine. This project tackles that problem and uses 3D Printing to solve it!
1. Introduction
HOME IMPROVEMENT WITH 3D PRINTING
The home is full of potential solutions, and it’s one of the places most 3D Printing nerds start their part-making journey after they run out of free models from sites like Printables & Thingiverse…
…and that makes sense! The home is a great place to solve problems with 3D printing. A replacement knob, a can opener, fridge magnet, that wrapping paper roll cutter, and so much more. The possibilities for solutions in the home are really infinite.
But when it comes to the next Part Detective Case File, we were focused in on solving a recurring problem of mine while cooking - organizing the spice rack. I’d like to stop asking “Where’s the Spice?”

When it comes to cooking, having easy access to spices makes all the difference. But when your spice collection outgrows your storage space/solution, things can get chaotic.
Glass jars were easy to store, but took up too much space.
I was always knocking them over hoping I didn’t break the glass.
Meanwhile, the spices we buy through Thrive Market (not a sponsor) come in tiny resealable, labelled bags. Did they take up less space? Definitely. But they can’t be stood up on their own.
The solution? We needed a custom 3D-printed spice rack—designed to fit our kitchen storage and store these resealable spice bags perfectly to make everyday cooking more efficient.
Let’s open up this Part Detective Case File and discuss the future of home improvement with 3D Printing!
P.S. Below are Affiliate Links for the Products we used in the Project. I earn commission from qualifying purchases. Any support is appreciated but not required!
THE
PART DETECTIVE
2. THE PART AND THE PROBLEM
THE PART
This 3D Printed Spice Rack is a completely custom solution, and something that we specialize in at AG3D. One of 3D Printing’s greatest advantage is complete customization. Since we have over 15 years of CAD Experience, all we need is a caliper, some inspiration, and a problem to solve.

THE PROBLEM
For the spice containers, we decided to just stick to these resealable spice packs for simplicity. If we can stop them from falling over the labels are great and will be nice for storage. This will be a big improvement over the glass jars and various assortment of brands & sizes.
THE SPICE PACK RACK WAS DESIGNED TO:
Hold each of our spices in one accessible location
Make removing and storing spice packs easier, especially while cooking.
One size fits all: Hold unopened and used packs neatly, without them falling over/out of place.
Allow easy viewing for the label, and remaining spice. Swapping out spices when empty should be easy too.
Make the design modular so we can 3D Print in multiple pieces for our ideal total length.
This will help us work around our 3D Printer size limitation (which every 3D Printer has) and print in multiple pieces.
Retrofit storage location: Our current spice collection is stored on a wire rack, so this 3D printed solution will work with the wire rack design.


3. Why MAKE THIS PART?

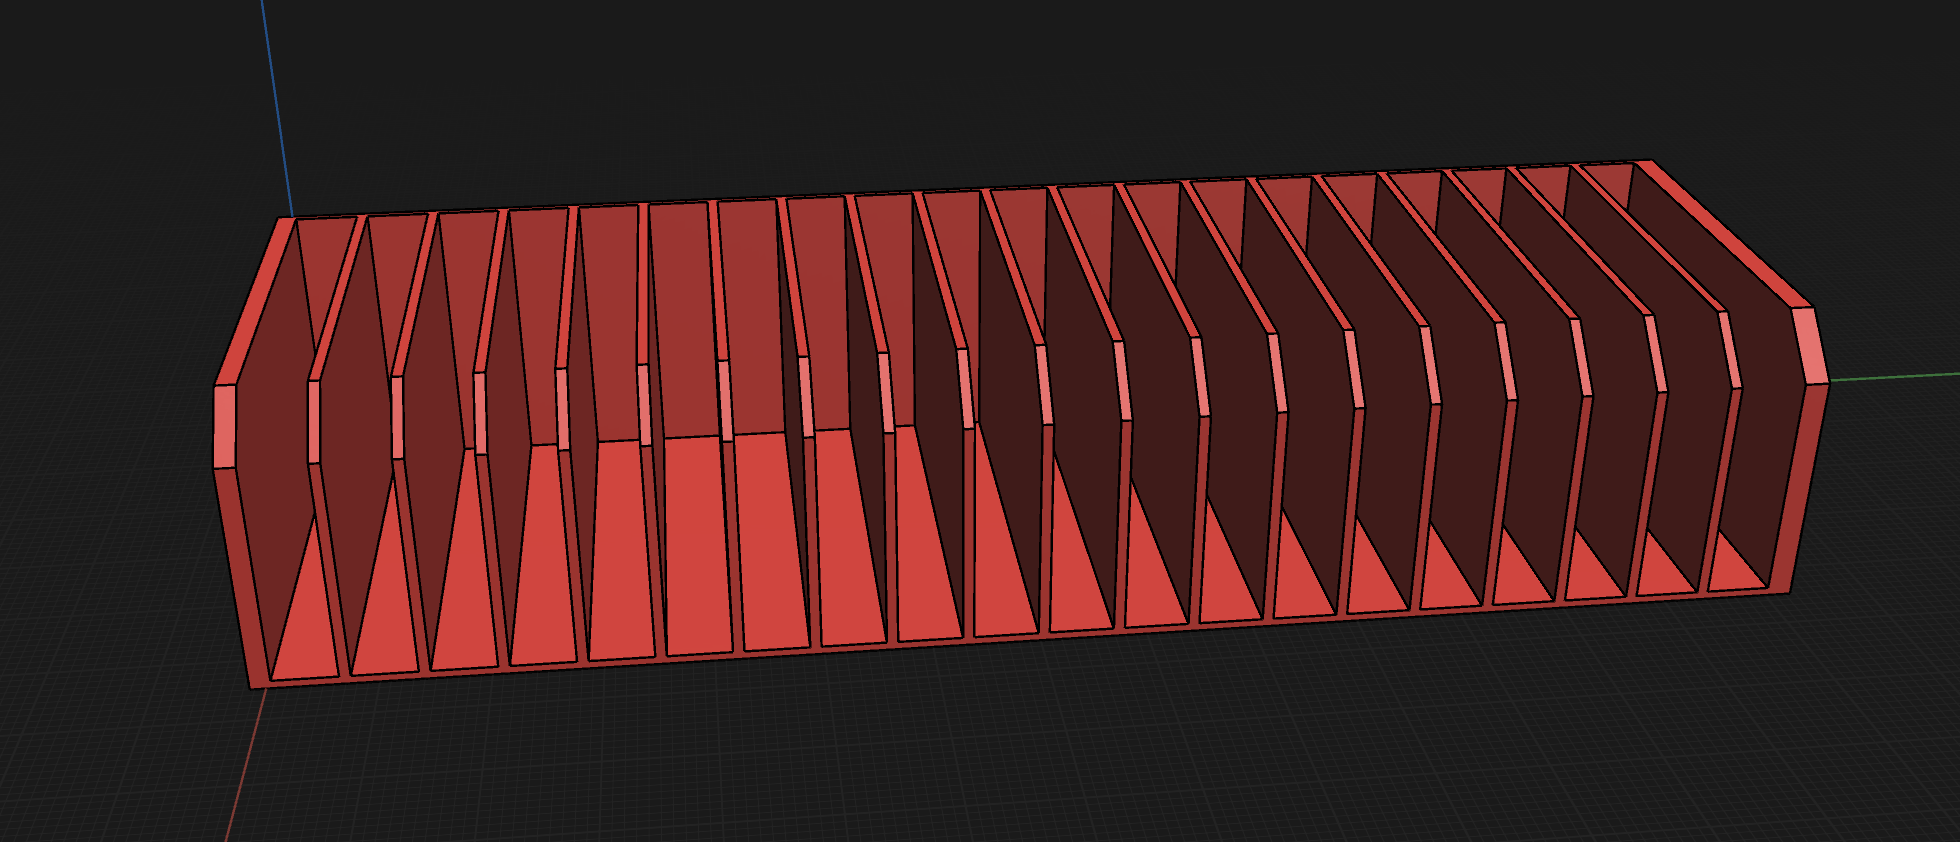
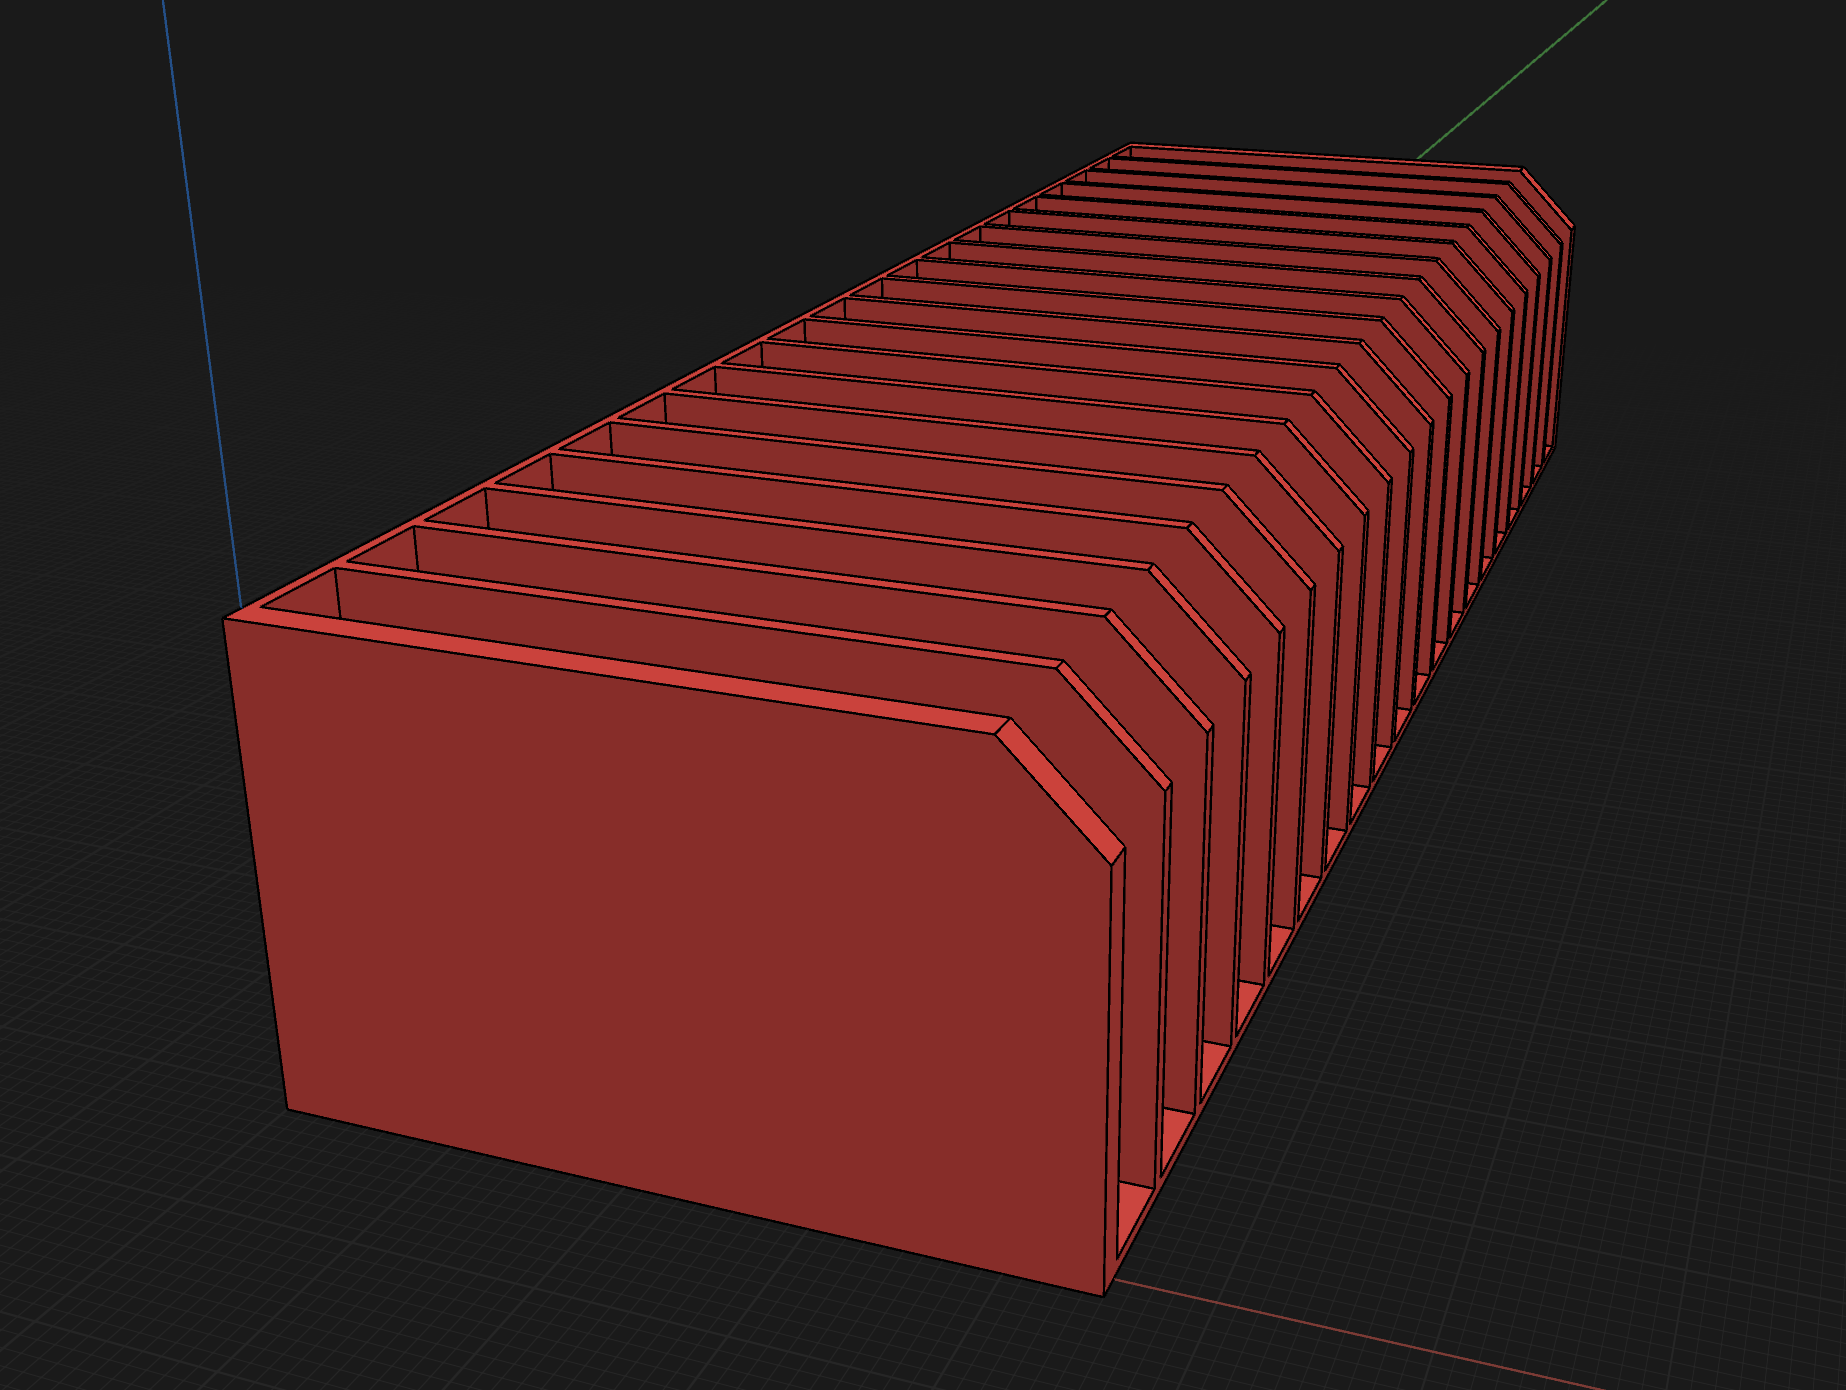
Here is a CAD rendering of the final model we designed for the custom spice rack. Don’t worry, we’ll dig into the design choices below.
UNIQUE PROBLEMS REQUIRE UNIQUE SOLUTIONS…
While I do have an insatiable need to 3D Print most things, there was no “ready to buy” generic spice rack that would fit our space and needs.
Not to mention, if a true Big Box solution existed it probably would be out of my budget and still not exactly what we needed.
So the only way forward was to design and 3D print our very own spice rack.
Note: An easy trap to fall in is thinking that anything and everything should be 3D printed. It’s about finding the right application and use case, and luckily, this one is perfect for custom 3D Printed solution!
THE FUTURE:
3D PRINTING IN THE HOME
This is a small but powerful example of how additive manufacturing in the home can bring on a new generation of “solvers”.
Instead of being a consumer, purchasing solutions made by someone else to solve a generic problem - YOU become the designer, and the manufacturer, and the prototyper. You become the maker.
I honestly can’t wait to see all the different ways people will solve problems. And, how different those solutions might be from what exists at the Big Box stores of today.
3DPRINTING CAN FIGHT SUPPLY CHAIN & COST CHAOS
The last 5 years have shown us the true power of 3D Printing in augmenting supply chain chaos into local manufacturing opportunity.
In a world where the pandemic stopped supply chains around the world, 3D Printing came to the rescue making facemasks, ear guards, ventilator parts, and nasal swabs.
We have also lived through an age where everything is more expensive from drawn-out inflation. Add in the latest trade wars and that problem continues to intensify.
While I didn’t start this Part Detective Case File BECAUSE of the increasing prices…I like to believe the universe was poking me to start doing it because it would be a fun mystery to solve. I think there will be more Home Improvement 3D Printing projects in the future, as I don’t think the trade wars and cost chaos will be over anytime soon. So let’s get creative and and become creators and not just consumers.
4. Investigation: Challenges We Faced
Creating a fully functional spice rack required solving a few key challenges:
Decisions on Organizing:
This can be the hardest place to start. You have to start with an open mind and a willingness to address the problem. If we had the freedom to design anything, what WOULD we want?
Size Limitation:
Once we decided we wanted to store 1 of each spice in our collection we knew the rack wouldn’t 3D Print in one piece. That meant we needed to figure out a bonding strategy.
Joining Parts with Precision:
How can we join multiple parts together and create one solid, uniform part? Are there any easy functions/tools to help us make the parts align better?
Simplicity and Material Saving:
What kind of design choices can I make to reduce material waste but still make a strong enough spice rack? Is there a way to orient the part in printing to help achieve this goal and save printing time?
DECISIONS ON ORGANIZING
DESIGN & FUNCTIONALITY
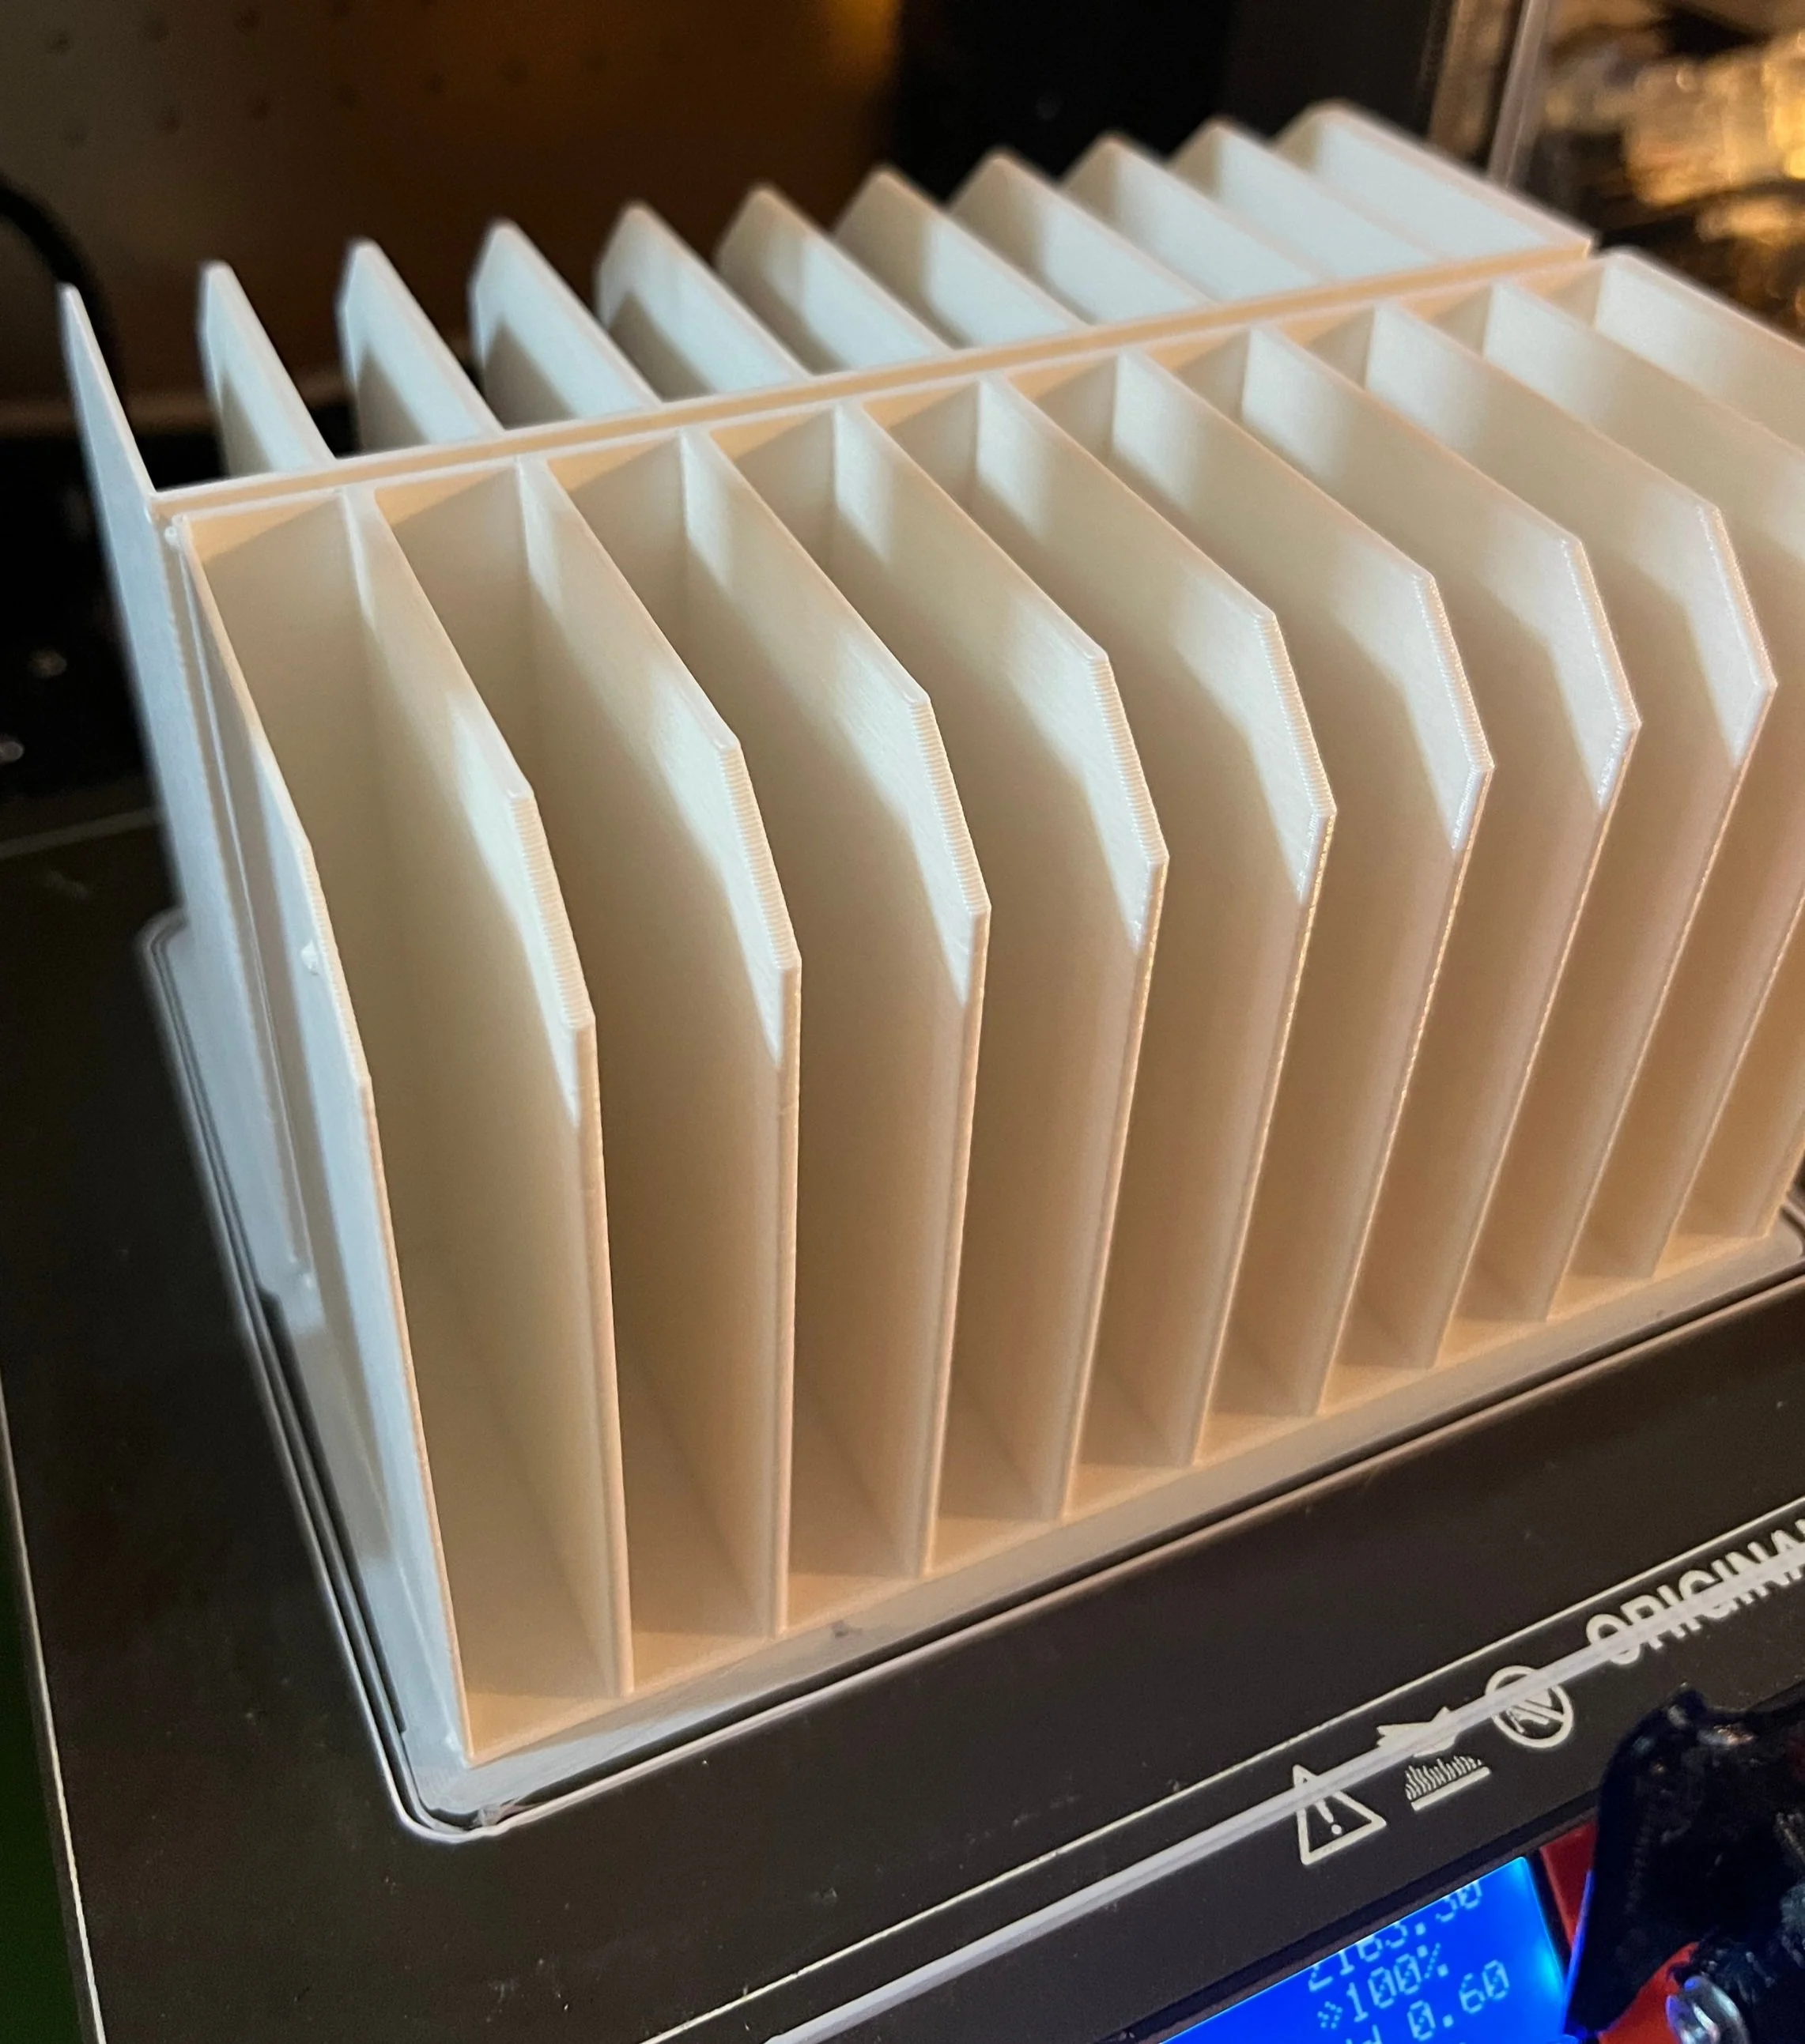
Open slots seemed like an easy choice with these spice packs, so that all of the spices would be standing upright, with the resealable openings at the top. With the open front slot, removing and returning the spice packs are easier while also allowing us to see (at any time) how much spice is left in each pack.
OBSERVATIONS & A CALIPER
While brainstorming the design, I was measuring the spice packs with a caliper, and made sure to find full, used, and almost empty spice packs, so I could get a good range of volumes for “the slot”.
DESIGN GOALS ACQUIRED:
Our finalized custom design requirements:
We had a total of 17 spices/packs to store when fully stocked. 17 slots will be needed in our spice rack
17 slots creates a part too large for our chosen 3D Printer. Part will be split in two part for 3D printing
Minimize material used and simplify design. Functional yet Simple.
Add a back “wall” but leave an open front slot for spice packs.
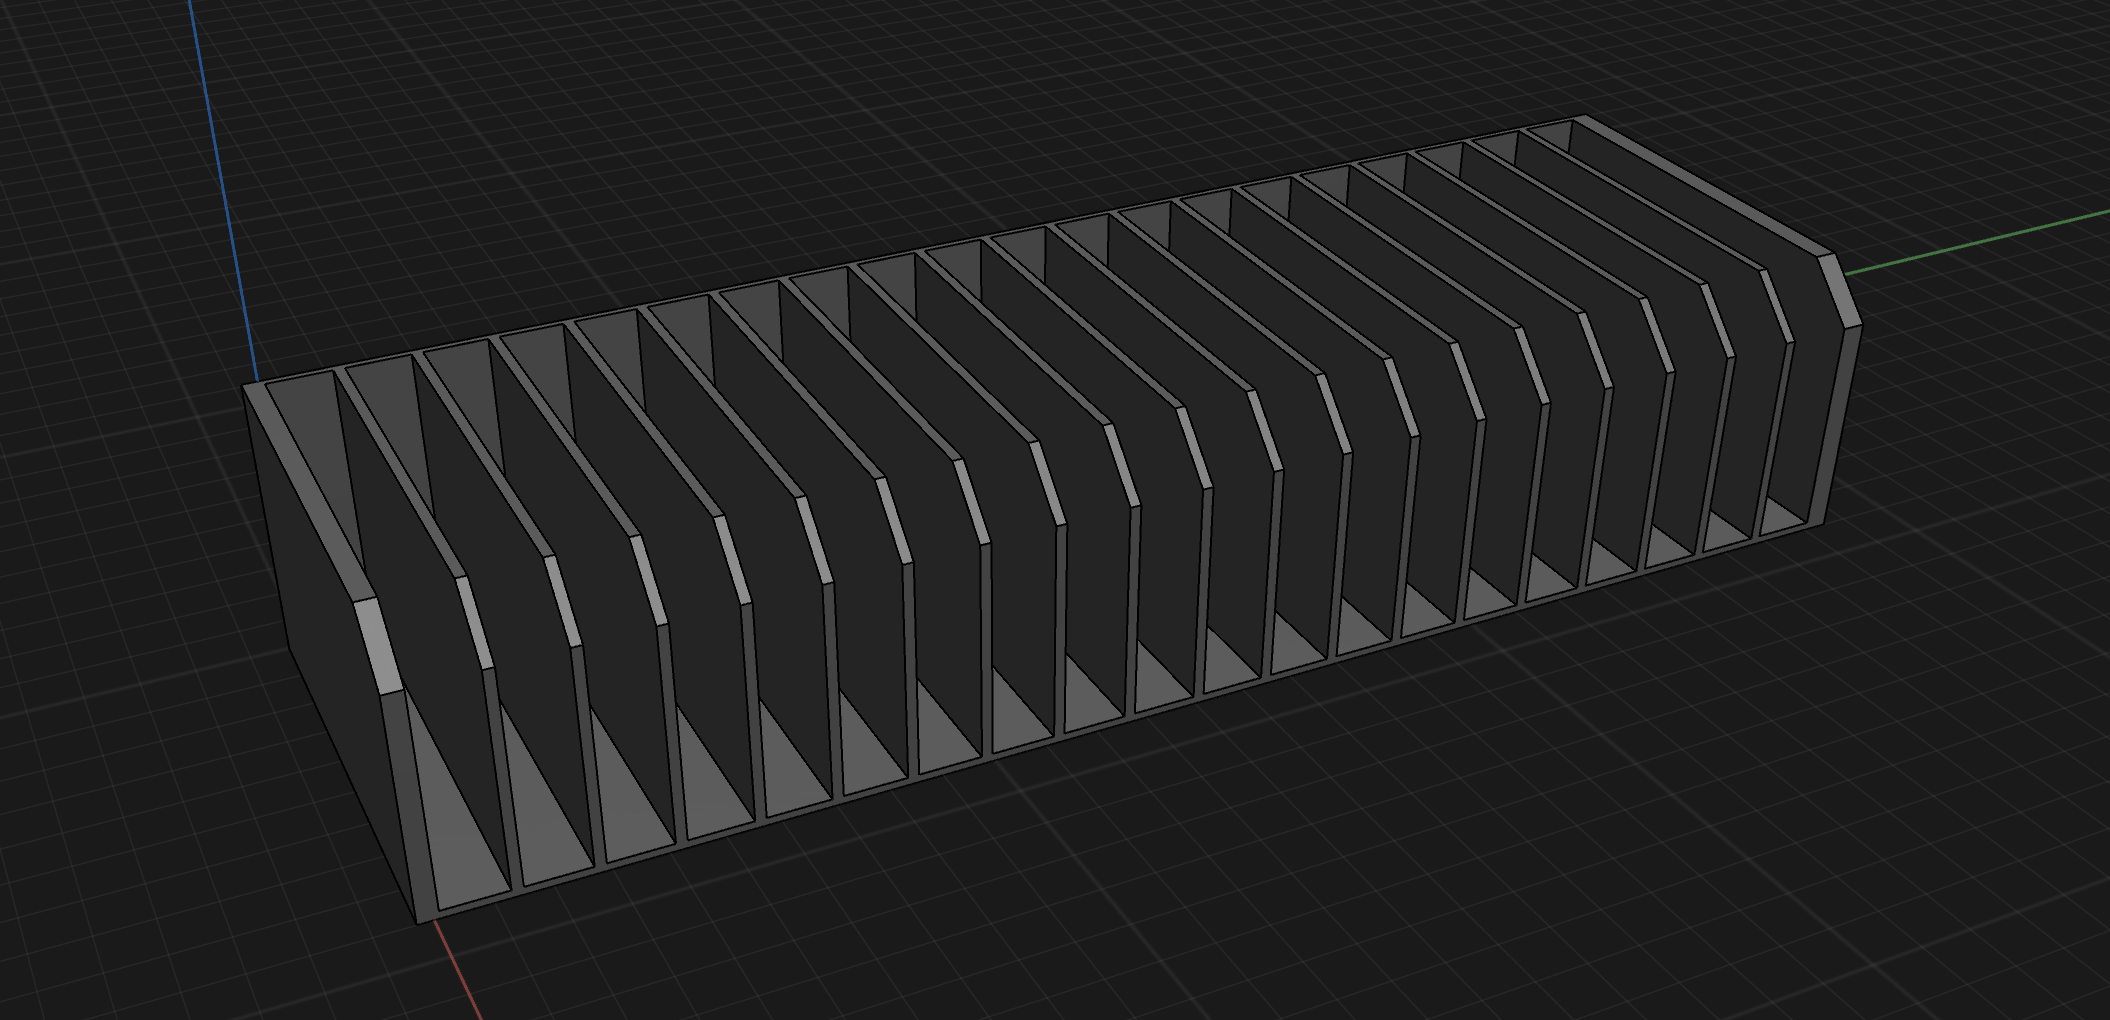
The CAD drawing in more detail using our design goals in mind. This is before the model was split in two for assemble after 3D printing.
SIMPLICITY & MATERIAL SAVING
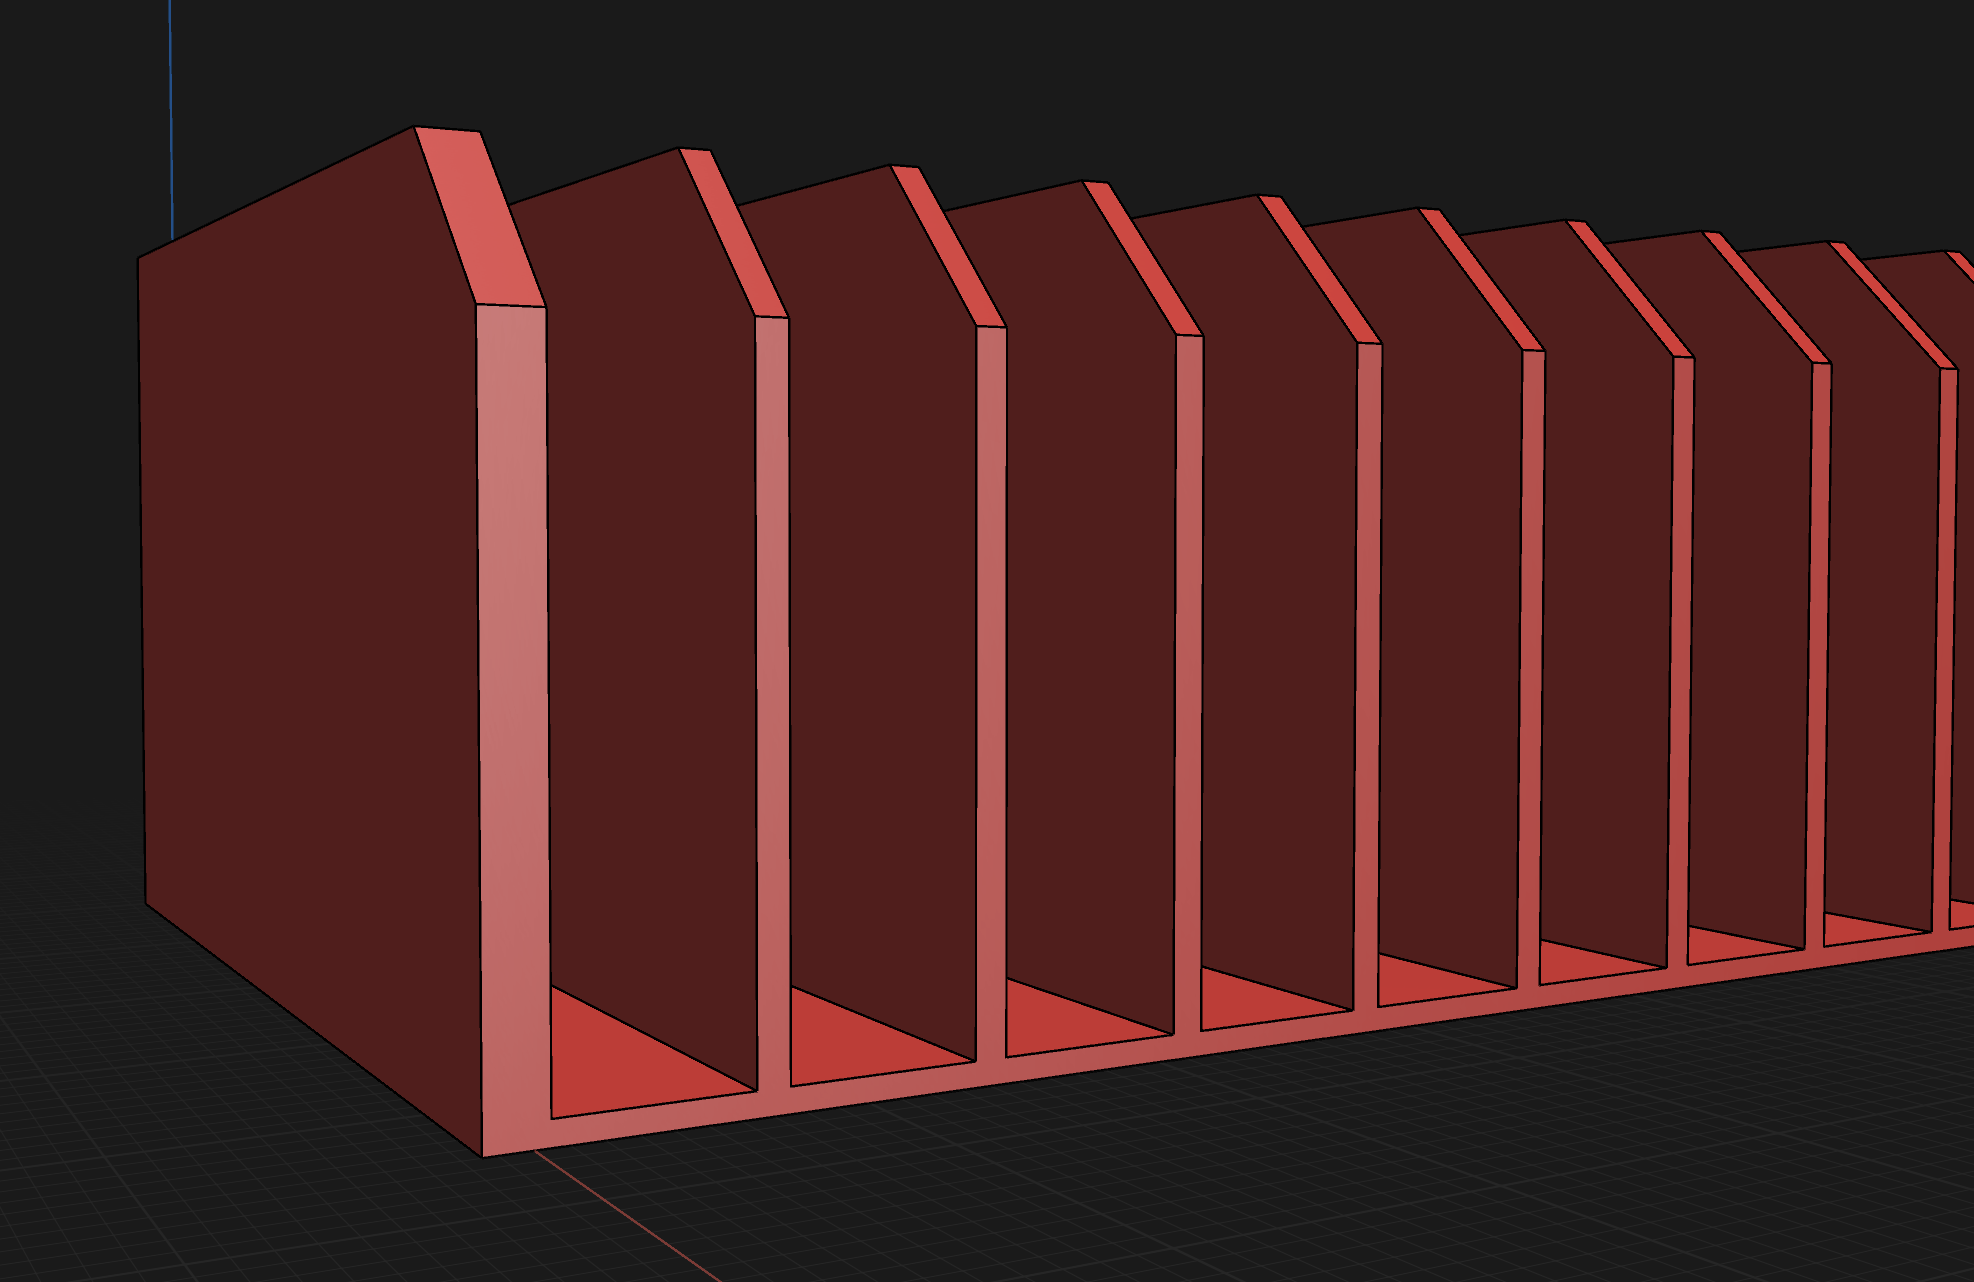
You can see the varying wall-thicknesses on the model here
Since all the labels are in the middle, our stand only needs to go to that height. Half the height needed = half the total layers = half the 3D printing time.
In order to minimize the material used, I found the minimal wall thickness needed for a strong wall. This wall thickness also has to be thick enough to be split in two and still sturdy enough for joining after 3D printing.

A Chamfer on the top right on each slot to help reduce some minor 3D printing time and material.
Using Chamfers in my designs is my way to simplify sharp corners or save material on otherwise square designs. We saved a few grams of material and minutes of printing just by using them. Future Me will also appreciate not scraping his hand/knuckles while grabbing for a spice pack, or worse, puncturing a pack just before putting it back in it’s place.
Time Savings by using a larger nozzle. By increasing the nozzle size to 0.6mm from 0.4mm (standard) we were able to cut the 3Dprint time up to 50%.
Also, with the larger nozzle, each strand of filament extruded is 50% thicker and thus stronger than the standard filament size.
JOINING PARTS WITH MORE PRECISION
We found a not-so-new feature for the first time in Prusa Slicer called “Add connectors” that creates joints for parts you split and intend to join. Users can choose the kind of joint, or in my case a knub, so you can locate the two pieces easily when you join them.

When I first used the “Add connectors” feature in Prusa slicer it didn’t work well with my original design. The software was doing what it was supposed to, manipulating the shape of my model. But, since my wall thickness was too thin for the knub we thickend the wall just enough to get a decent joint to locate the parts during bonding.

For adhesive, I tried super glue which did not work well. So, I went back to my old reliable - the hot glue gun. The great thing about hot glue is that you can make a pretty durable bond that can last but is not permanent permanent like super glue or epoxy. That way, you can always start over if you want. This is prototyping after all!
SIZE LIMITATION
Every 3D Printing machine has a part size limitation. And almost everyone wants to 3Dprint something slightly larger than what they have. It’s natural. Luckily, size doesn’t matter when you can 3D Print the final model in multiple parts and assembly it later.
By splitting the rack in half, 8 slots on one side and 9 on the other, we were able to 3Dprint both halves on the same build platform.
ORIENTATION & TIME-SAVINGS
The first layer of a 3D Print is everything. It determines the overall chance that your part finishes completely and doesn’t end up a ball of filament spaghetti.
When you are 3D Printing multiple parts at a time, it’s even more important to choose successful orientations to reduce your risk for failure. Because one part fail in a job with multiple parts could mean failure for all. And there’s nothing worse than getting zero good parts when you printed more than one. That’s why it’s important to find a happy medium between your drive to finish 3D printing and logically making sure every 3D Print job has the highest chance for success.
WHY I CHOSE THIS ORIENTATION:
I chose this orientation because my 3D printer was in need of some TLC (a.k.a - fine-tuning & calibrations). The back wall of the part is not the largest surface area, which would help in this case.
I was seeing warping/failures on large surface area parts before - so I went with this one instead. The outer edges of my build plate were just not printing even & flat enough to rely on it.
The final orientation we chose for 3D Printing our custom spice rack that conventiently fit together on the bed sheet. The “back wall” of the Spice Rack was used as the first layer for 3D printing
WHY I CHOSE A LARGE NOZZLE SIZE:
The 0.6mm nozzle was chosen after realizing that I could cut the overall 3D Print time in half.
And better yet, due to the simple geometry you would barely notice the difference in quality.
So it’s a real win for time-savings while not compromising on quality.

3D Printing Stats for 0.4mm Nozzle

3D Printing Stats for 0.6mm Nozzle
5. The Cost of Bringing This Part to Reality
A view of the 3D Model for our Custom Spice Rack, before 3D Printing it into Reality!
Rather than spending money on a generic storage solution, 3D printing allowed us to create a completely customized product for just the cost of filament.
But we’re outlining the cost of using the Part Detective service as well, in case you aren’t the kind of person to DIY something like this.
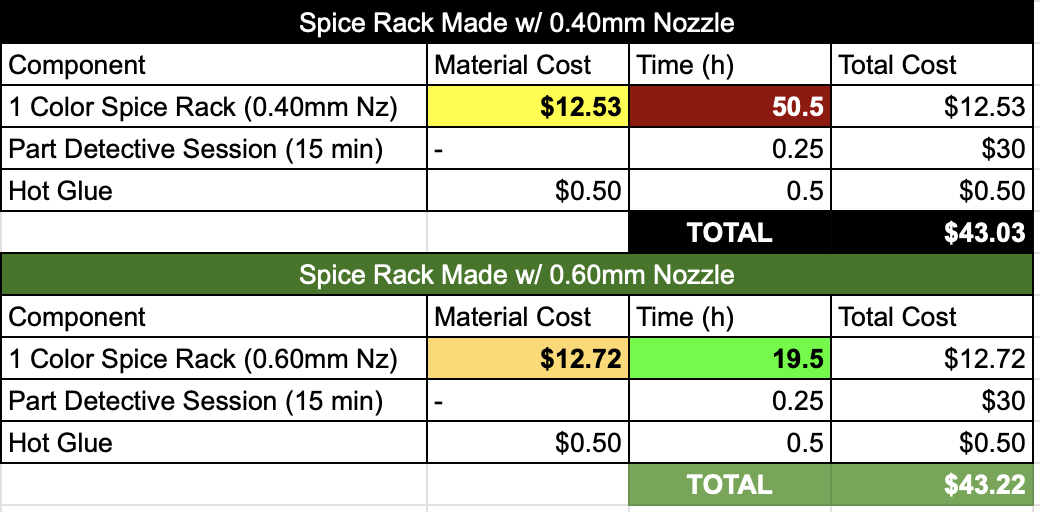
Here is a breakdown of the costs involved with making this Custom Spice Rack from scratch with 3D Printing. As you can see, the cost is essentially equal with either nozzle, while the time savings are the clear winner for the larger 0.60mm nozzle!
The more interesting thing here is the dicotemy between actual part cost and total 3D Print time.
The cost is essentially the same with either nozzle choice.
But, by choosing the larger 0.60mm nozzle we are cutting the 3D Print time in half, so we get the part in 1 days time instead of 2.
And of course, since we are the Part Detective that measuring/ideation stage is no cost to us. So really, it’s just the cost of filament and hot glue to make this part. When you consider $12.72 as the cost of a custom Spice Rack to fit our space and needs, it beats out even the biggest box store and Amazon itself.
The Assembly was completed quickly, using some clamps to keep the two piece model together. The alignment pegs were OK. I would do more research in the future and perhaps start the design from scratch with this feature in mind.
I can’t recommend a hot glue gun enough for rapid prototyping! It can also be great for final assemblies too. Especially for Home Improvement where you might need to take it apart, move the solution elsewhere, or if plan to do some painting or renovations and don’t have a “permanent” spot for it.
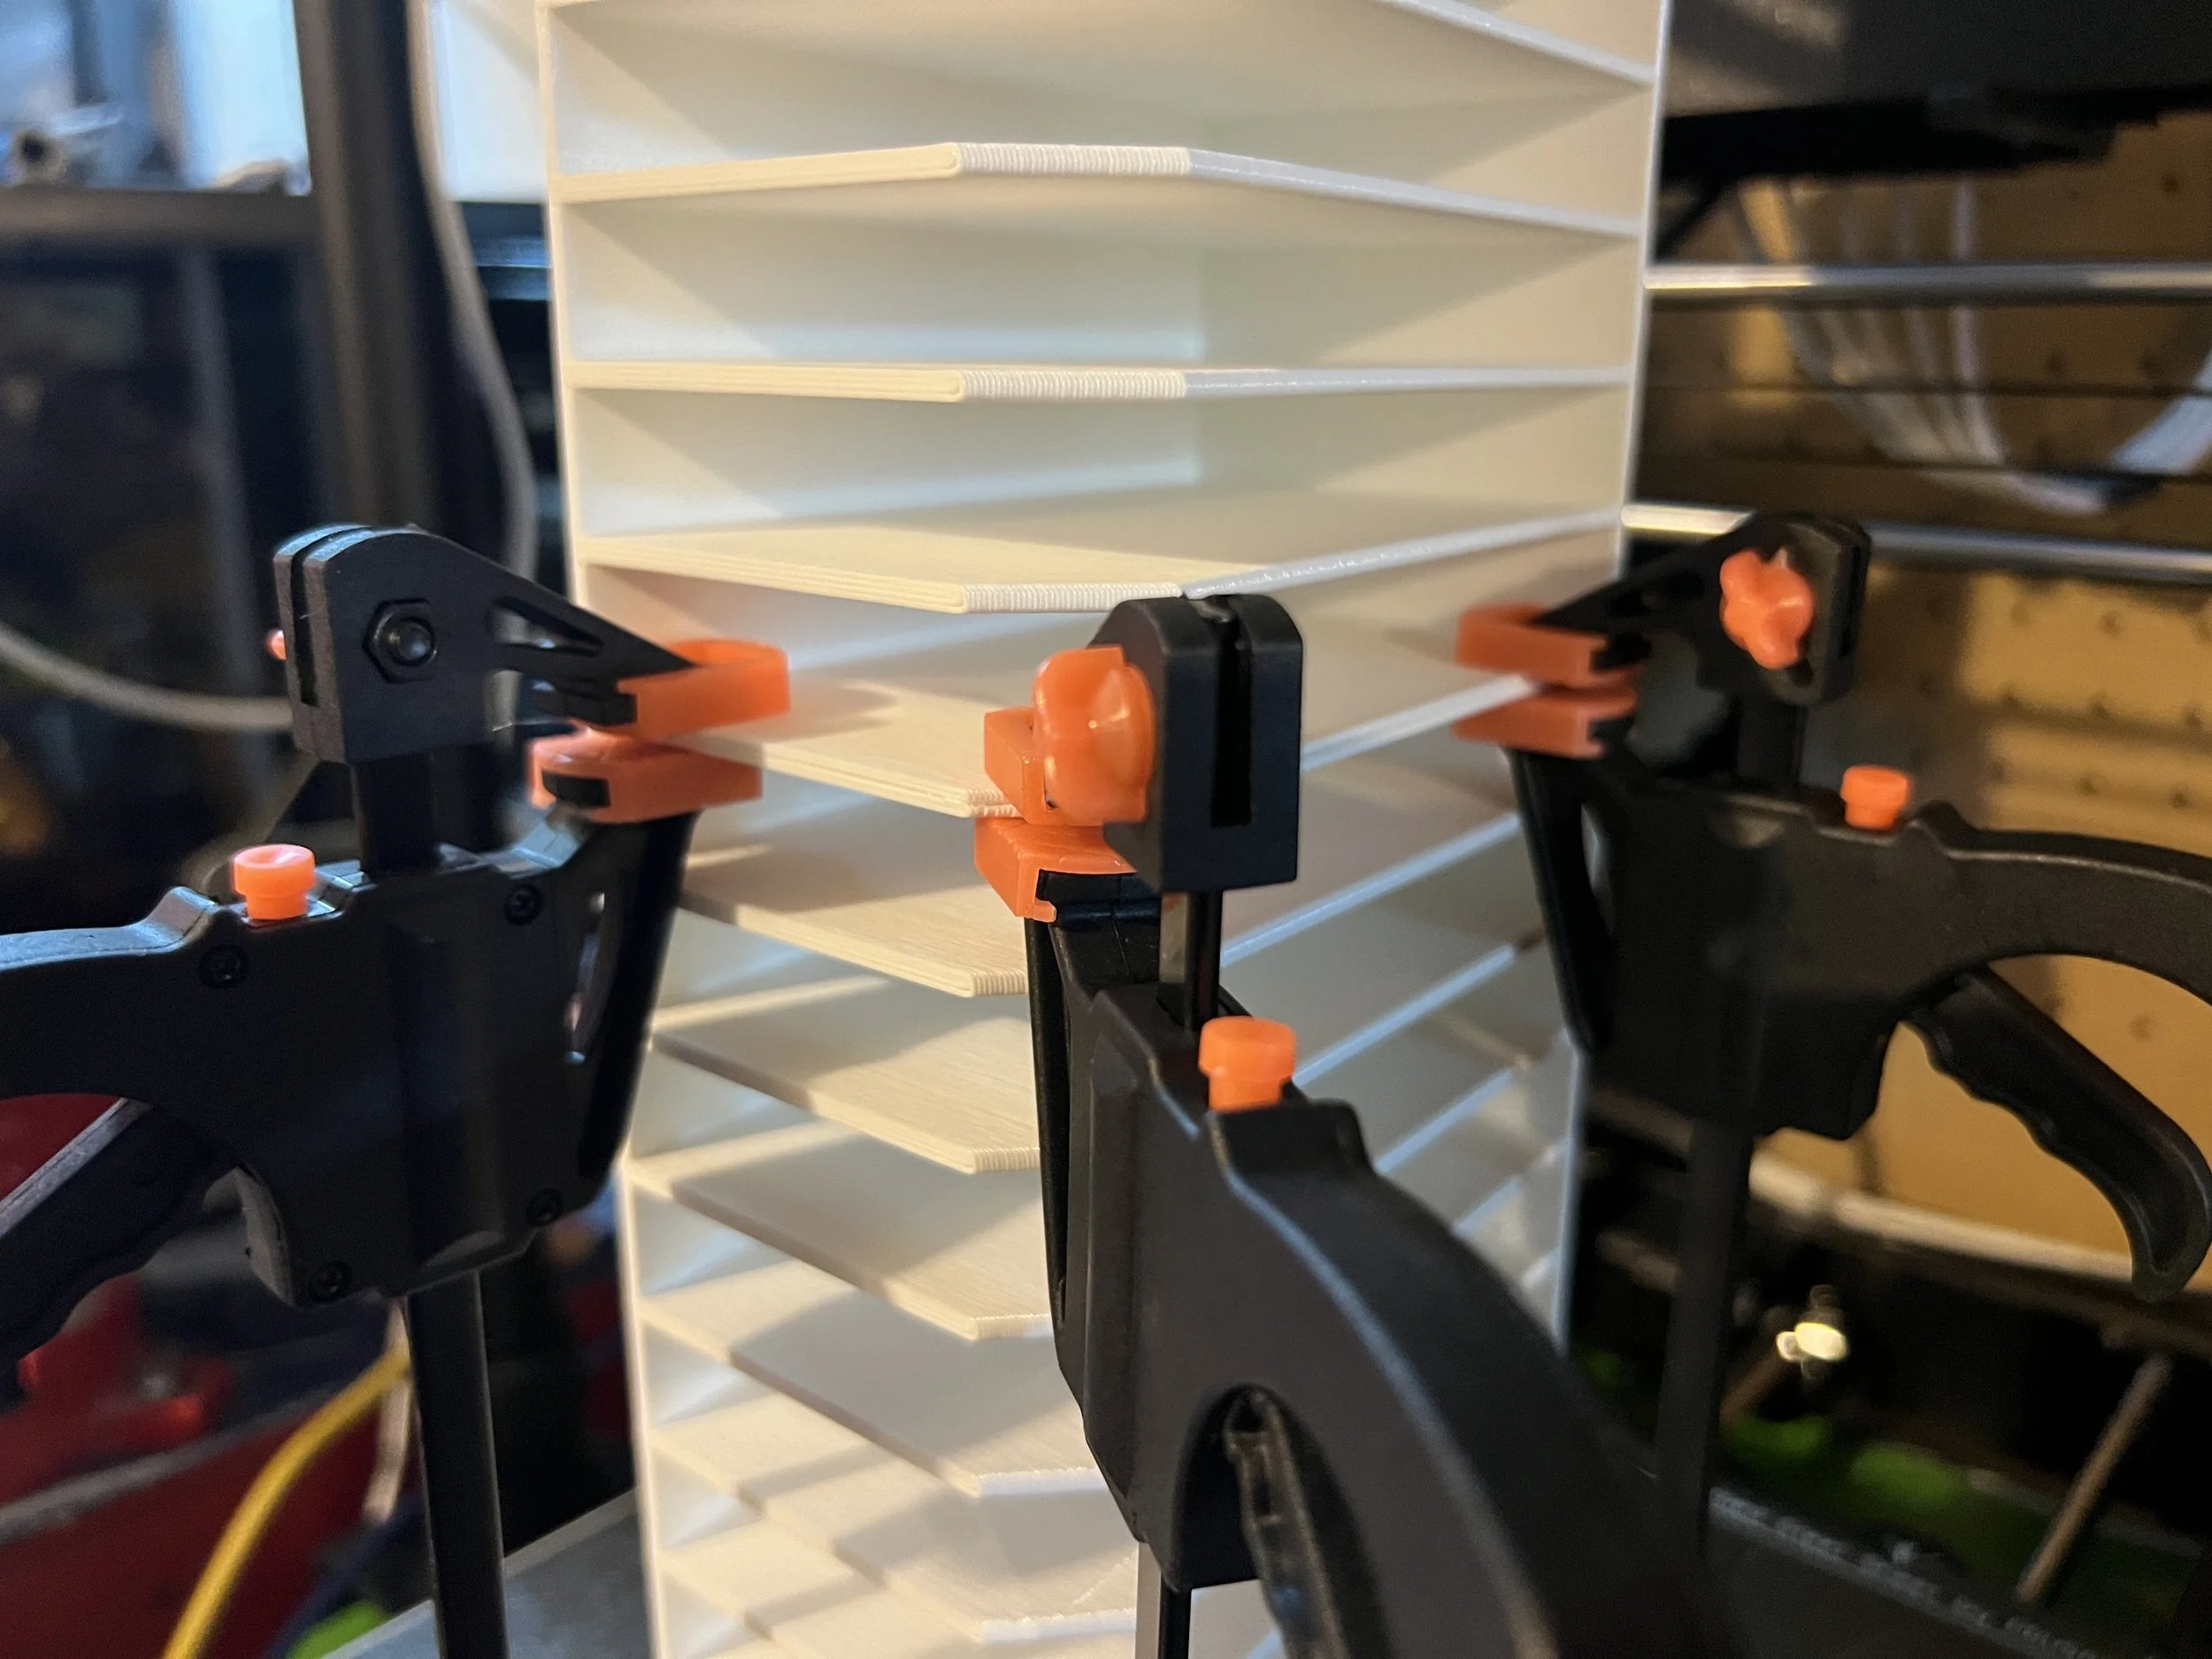
Close up view of the clamped section in the middle of the spice rack.
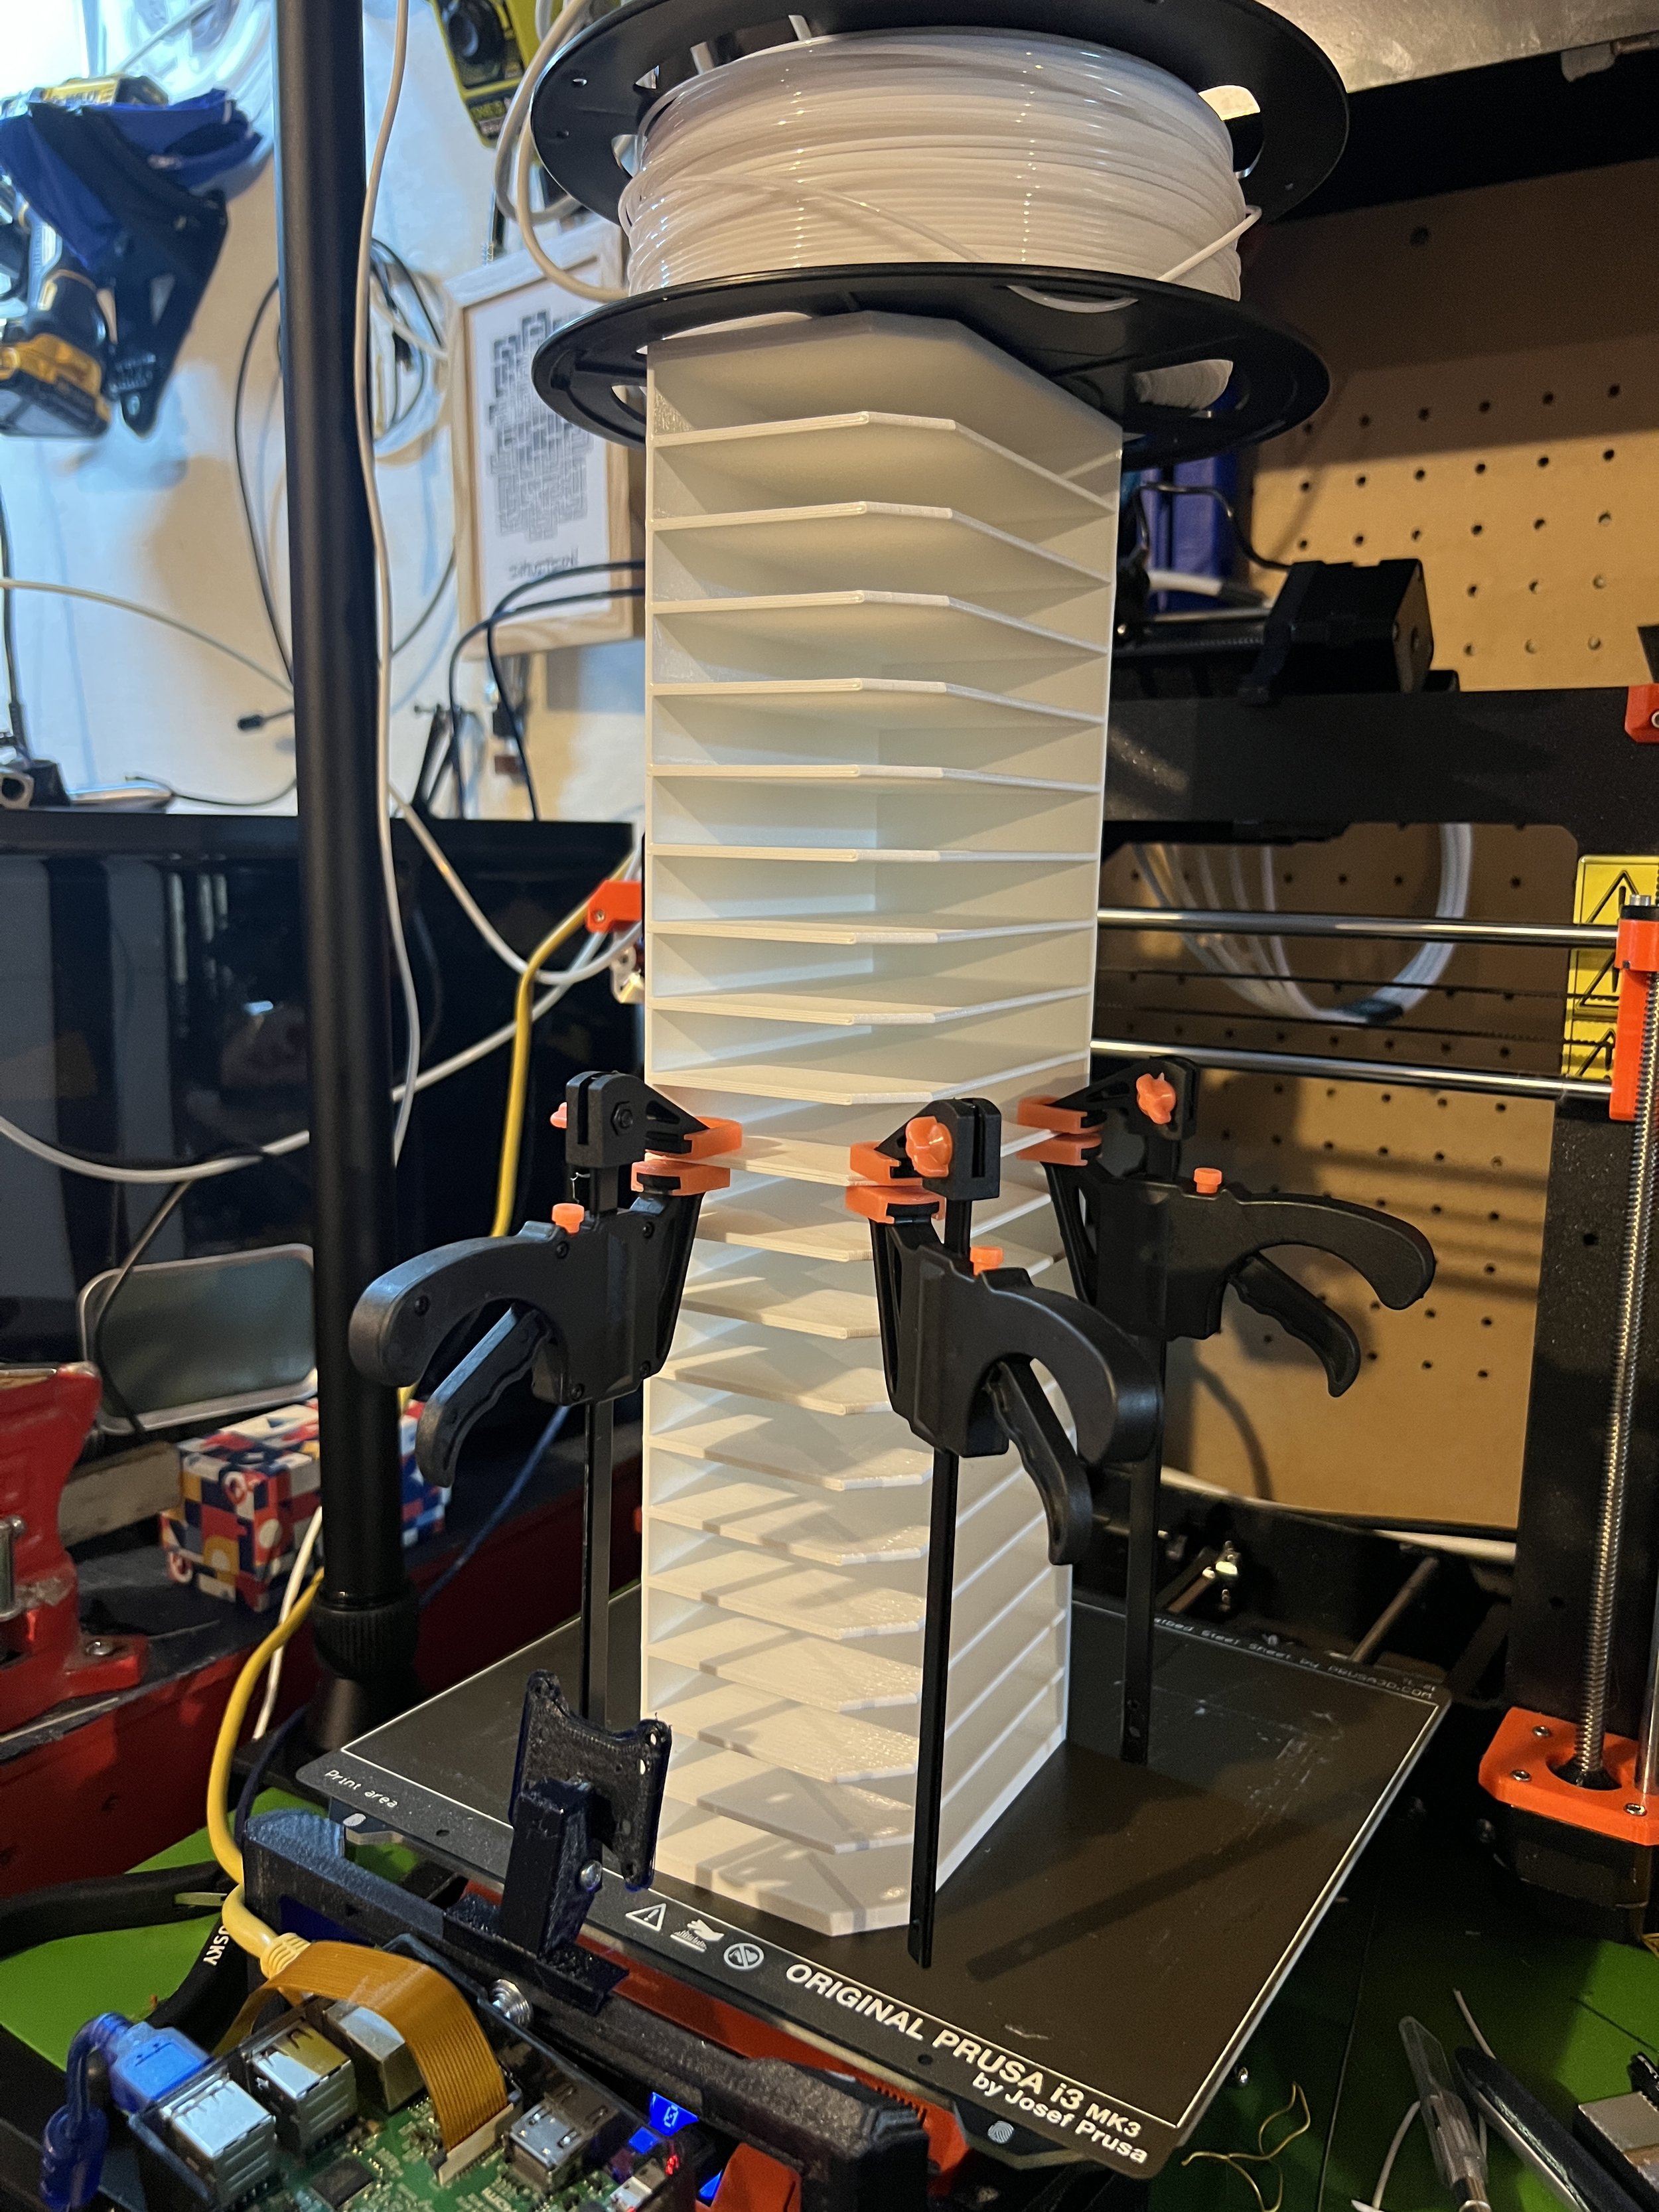
We also wanted to make sure the center of the walls being bounded were compressed so we used a partially used 1kg spool of material to weight it down.
6. How “The Part Detective” Made It Easier
This project highlights how 3D printing enables problem-solving in everyday life, especially in the place you spend most of your time - your home!
Here’s how the Part Detective helped solve this mystery and tackle the challenge:
Rapid Iterative CAD design on the spot!
It helps when you’ve designed real parts for 15 years. With our experience, all we need is a measuring tool and our design software and we can design almost anything to fit almost anywhere.
Confidence to go Modular!
We have 3D Printed many parts that require multiple pieces to make a much larger, final part. Some early makers stop projects early when they know they can’t 3D print it in one piece. But with experience, you learn how much potential making larger parts in pieces has for a project.
Taking advantage of new/never-before-used features to help us get things done
Prusa’s new alignment feature, although not perfect, gave us enough alignment to make a great part. Classic engineers and designers might stick to what they know, which has it’s advantages. But we think you should always be learning and looking for new ways to make things. You never know what you’ll learn one day that helps you on tomorrow’s project.
We had a final part in the first try!
With proper planning and mindfulness we were able to go from ideation, to design, and through build prep and made all the right choices to end up with our final part by the end of the 3D Print.
While that’s not the general case when 3D Printing, it showcases how our approach and experience can help reduce reduce the overall time and effort needed to get to a final part you’ll love!
What started as a small but irritating kitchen frustration turned into a customized everyday convenience, thanks to the Part Detective!
7. Case Closed: The Final Part
The custom spice rack has become a daily staple in our kitchen. Spices are now organized, easy to access, and stored efficiently without taking up unnecessary space. Everything has it’s place, and that makes things easiers. No more saying “where’s the spice?”
Beyond just spices, this project demonstrates how 3D printing can be a practical tool for every household. From organizing your kitchen to creating custom storage solutions, there are endless possibilities for home improvement. And we’re only just scratching the surface of wha't’s possible!
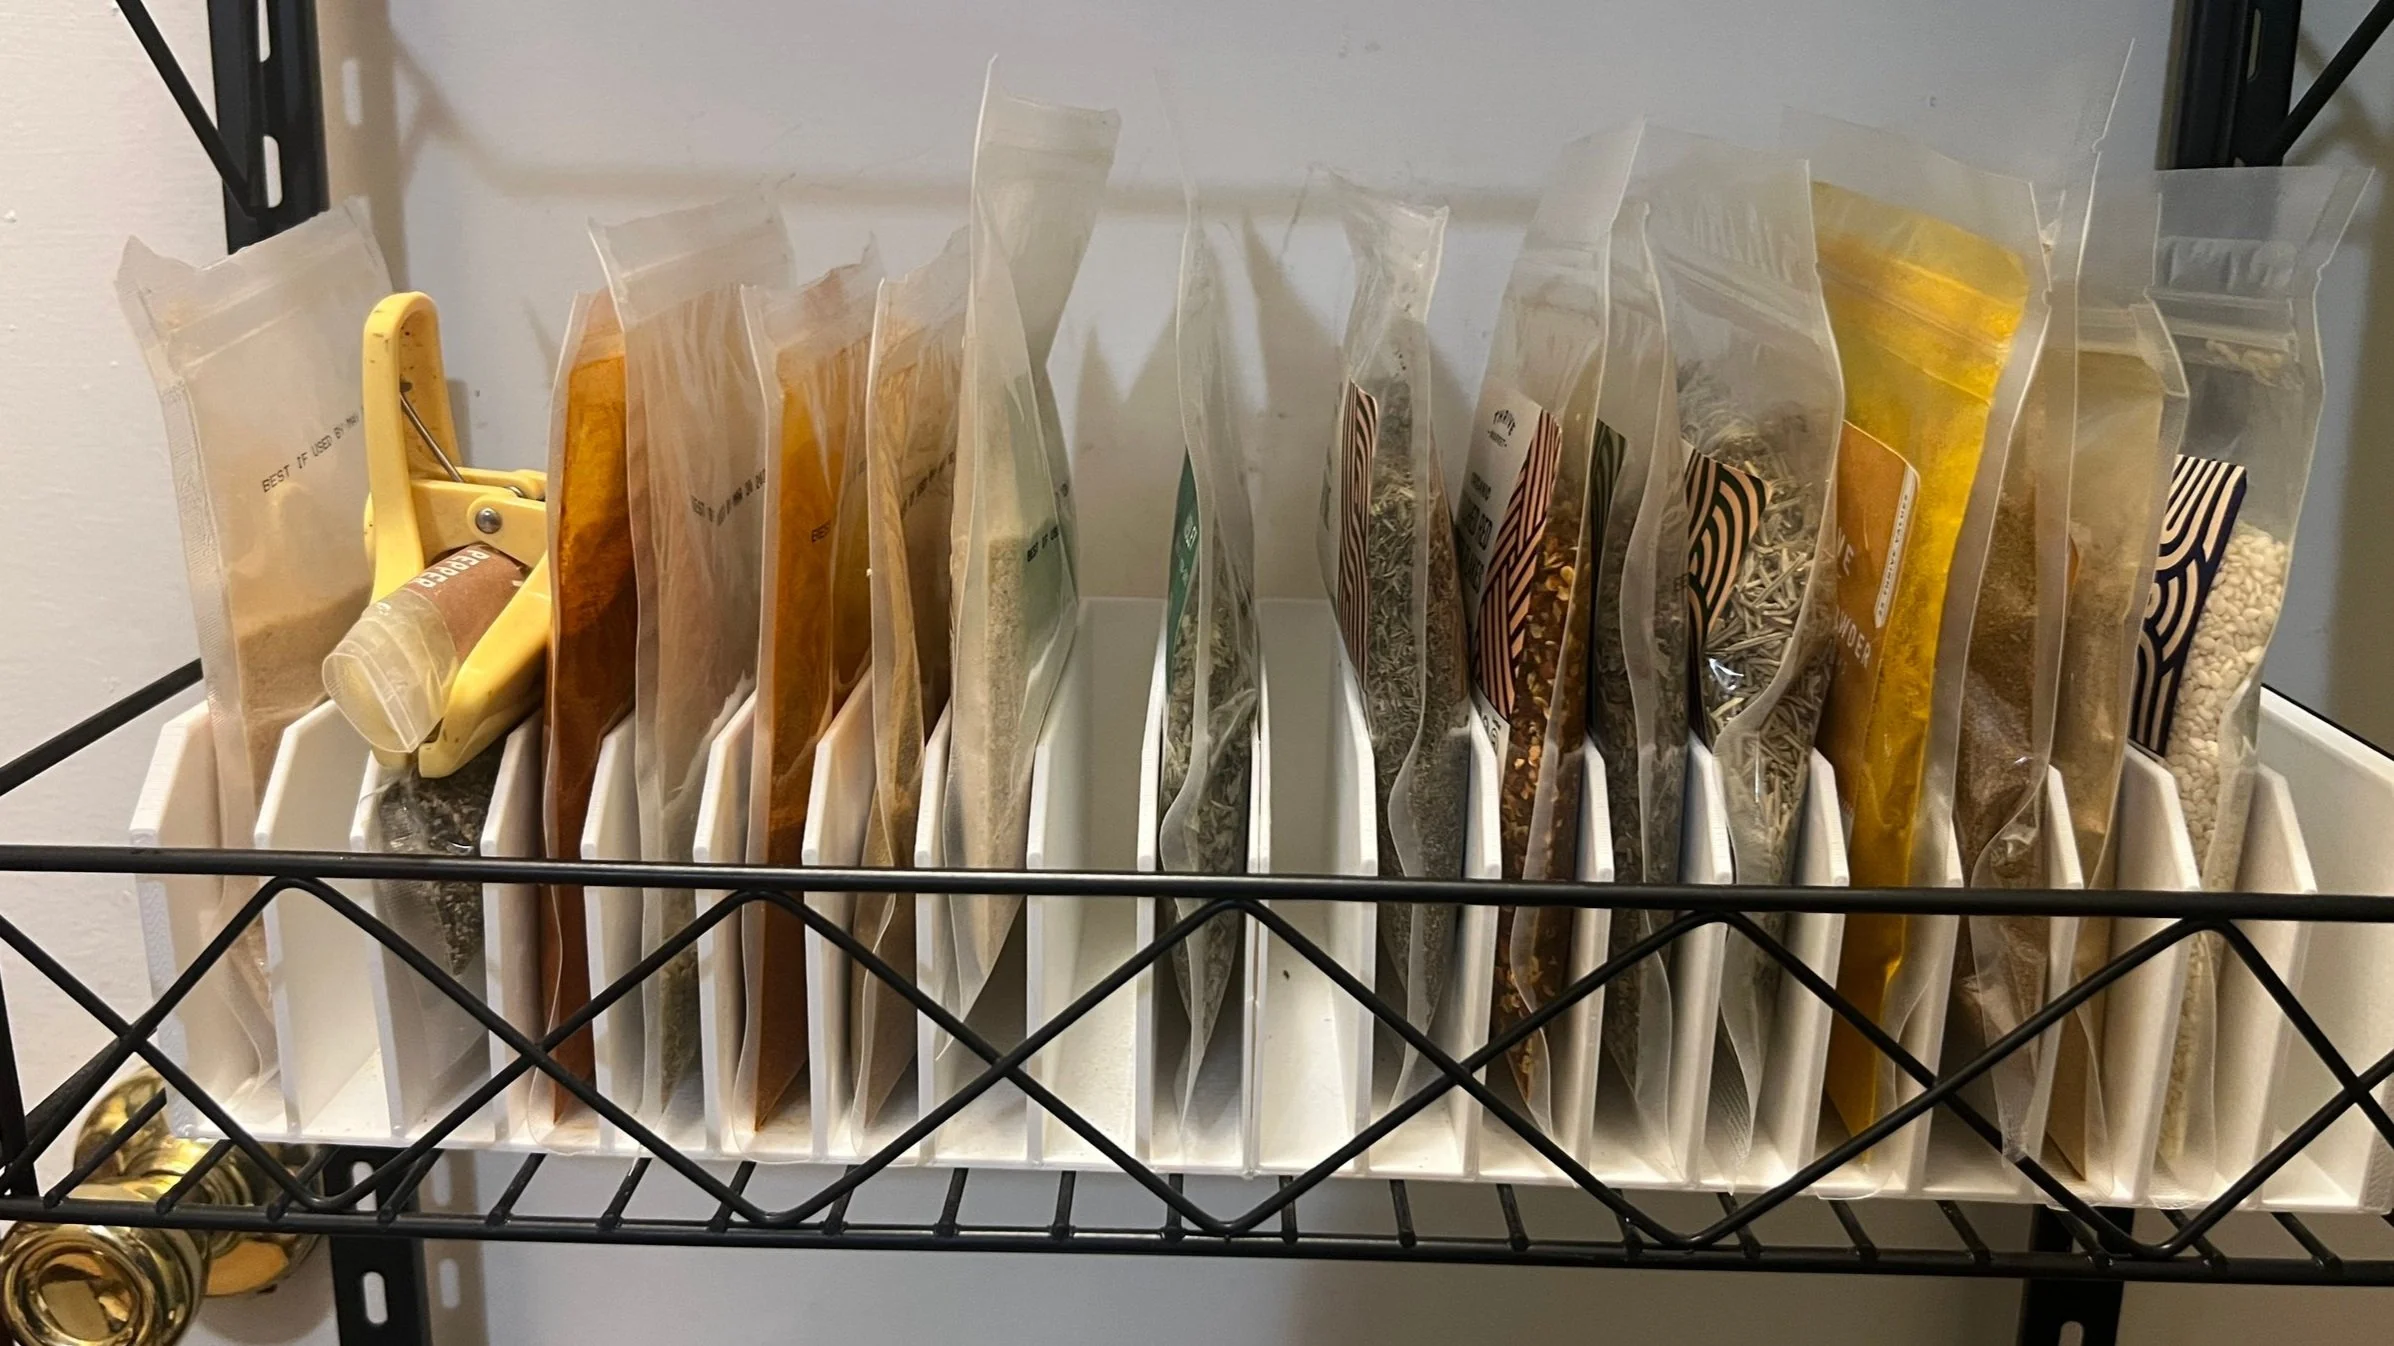
Our Spice Rack in use weeks later! It really has made a huge difference in our day-to-day! Happy with the solution and the 3D Print is still holding up well.
WHY 3D PRINTING IS THE FUTURE OF HOME SOLUTIONS
Create Custom-Fit Designs – No more “one-size-fits-all” solutions.
It’s Cost-Effective – 3D print only what you need, when you need it.
It’s ♻ Sustainable – Reduce waste by making parts in your home. This reduces the overall carbon footprint of buying a product, where every material and piece needs shipping, from creation to assembly, and then eventually in your home. Cut most of that out by BEING the maker/manufacturer yourself!
It 🌎 Empowers Creativity – If you can imagine it, you can create it. Imagine if even a quarter of the population used their own creativity to solve Home Improvement solutions? We’d have some truly diverse and incredible solutions from house to house, instead of cookie cutter solutions and neighborhoods.
WHAT DID YOU THINK?
Let us know where in your home you think 3D Printing could help with your Home Improvement!
What problems do you face day-in-day out that a custom solution might help?
What things do you have in the home that work, but not well and really need a redesign?
Or where could a completely custom solution transform your day-to-day in your home?
Tired of clutter in your home? Looking for a custom storage solution for your home? The Part Detective is here to help on your next project!
Contact us at ag3dpartdetective@gmail.com to get the conversation started!
See more of our projects on Instagram: @ag3dprinting
Looking for a unique 3D printed gift? Visit our Etsy shop: ag3dprinting.etsy.com
One last digital view of the Spice Rack 3D Model…
Don’t forget to email us at AG3Dpartdetective@gmail.com for help on your next 3D Printing mystery.
Until next time, stay curious and good luck 3D Printing!
Alex G. Orphanos
THE PART DETECTIVE
This is the Part Detective, signing off until the next 3D Printing mystery needs solving!