
One Business Card To Rule Them All? Multi-Color 3D Printing & Embedded NFC Tags
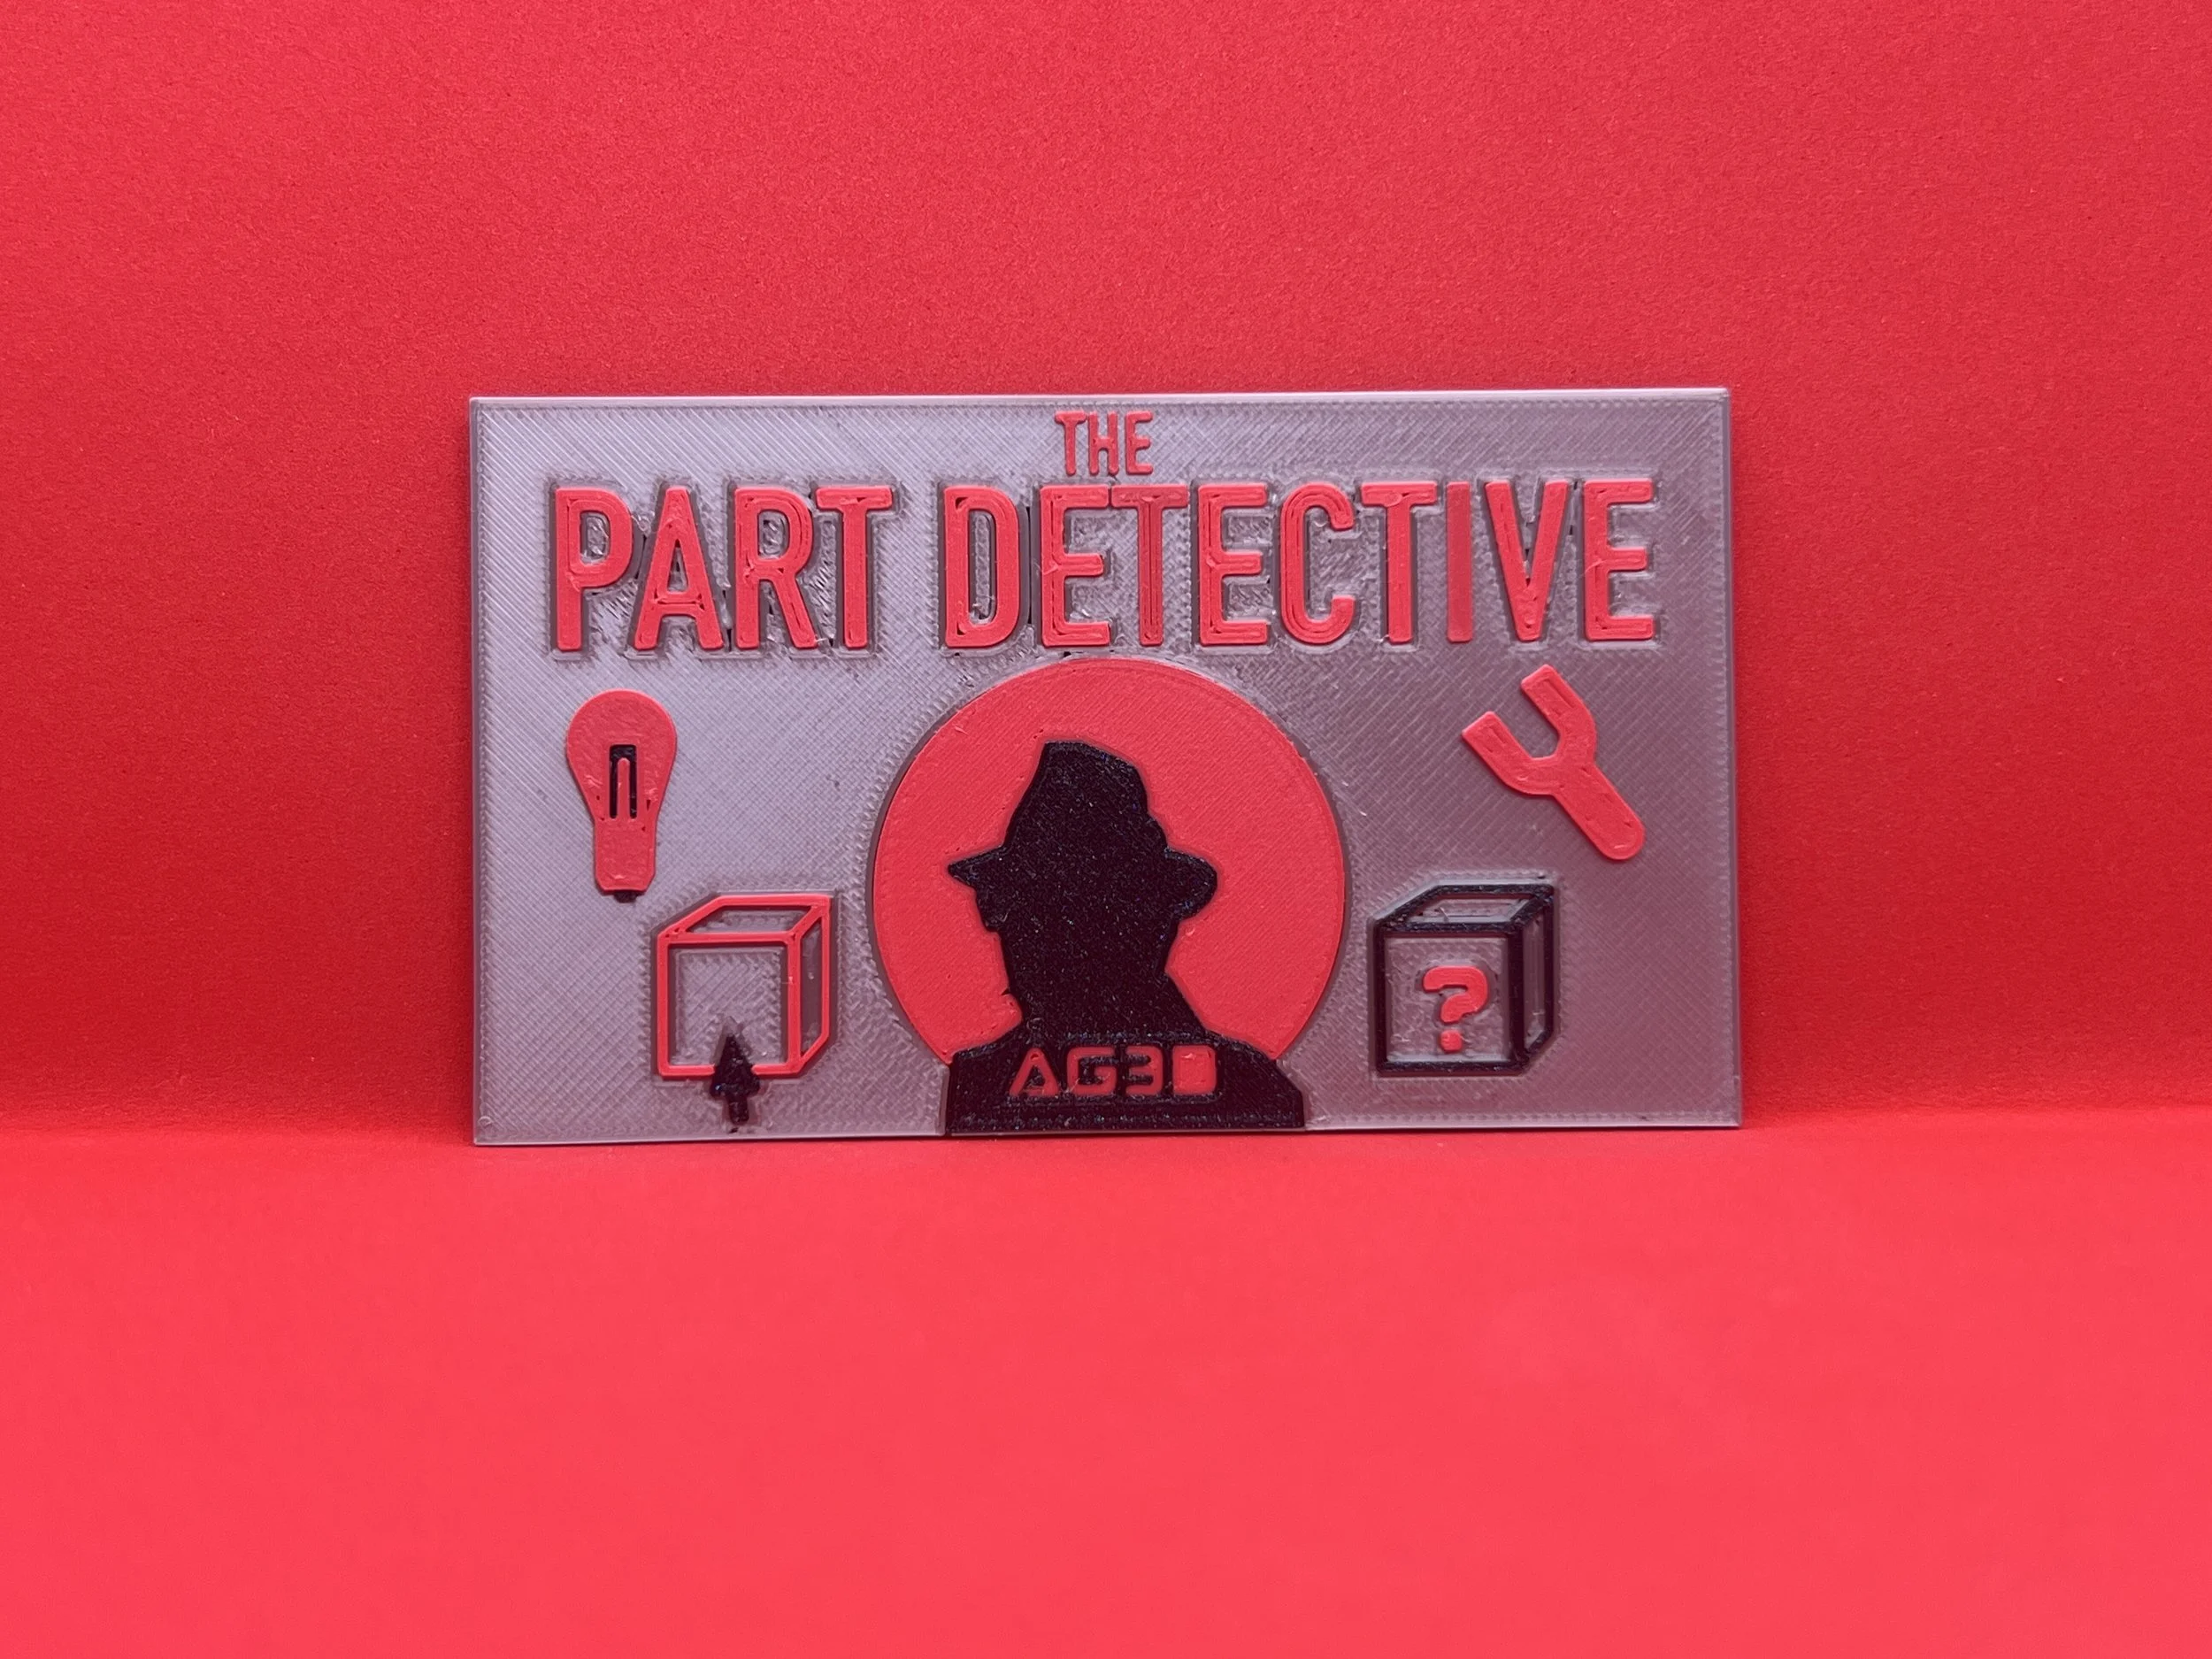
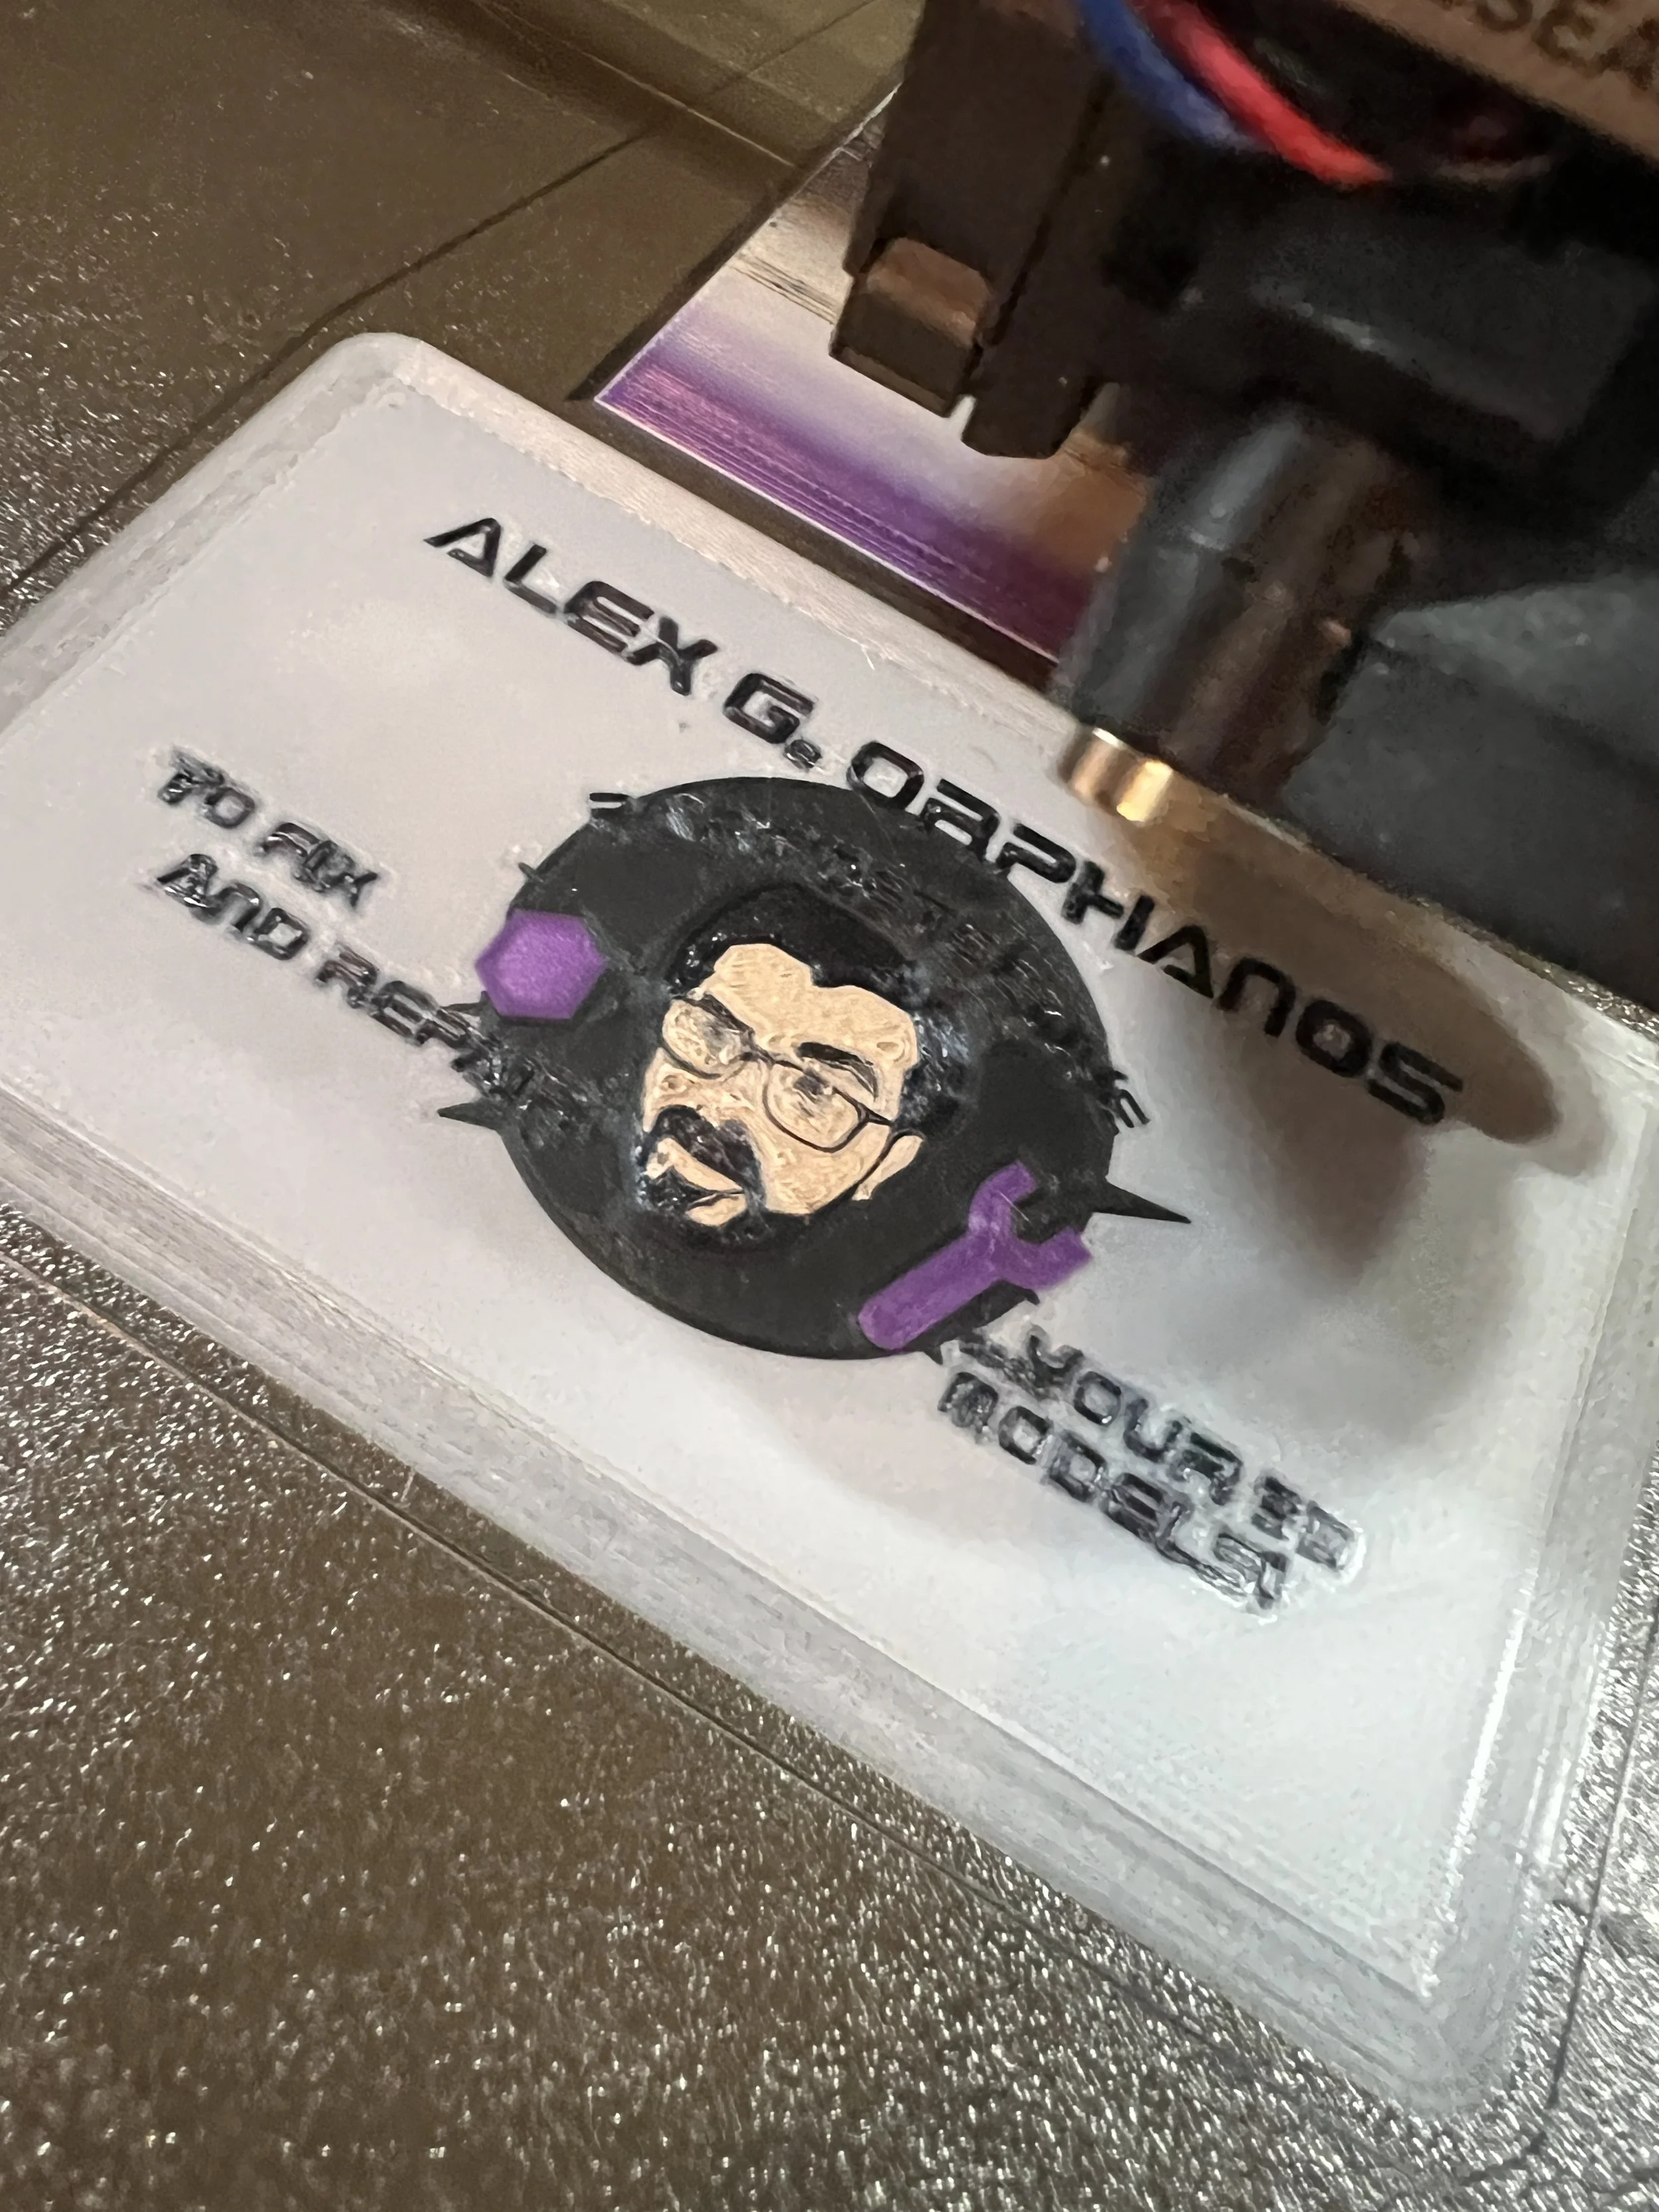
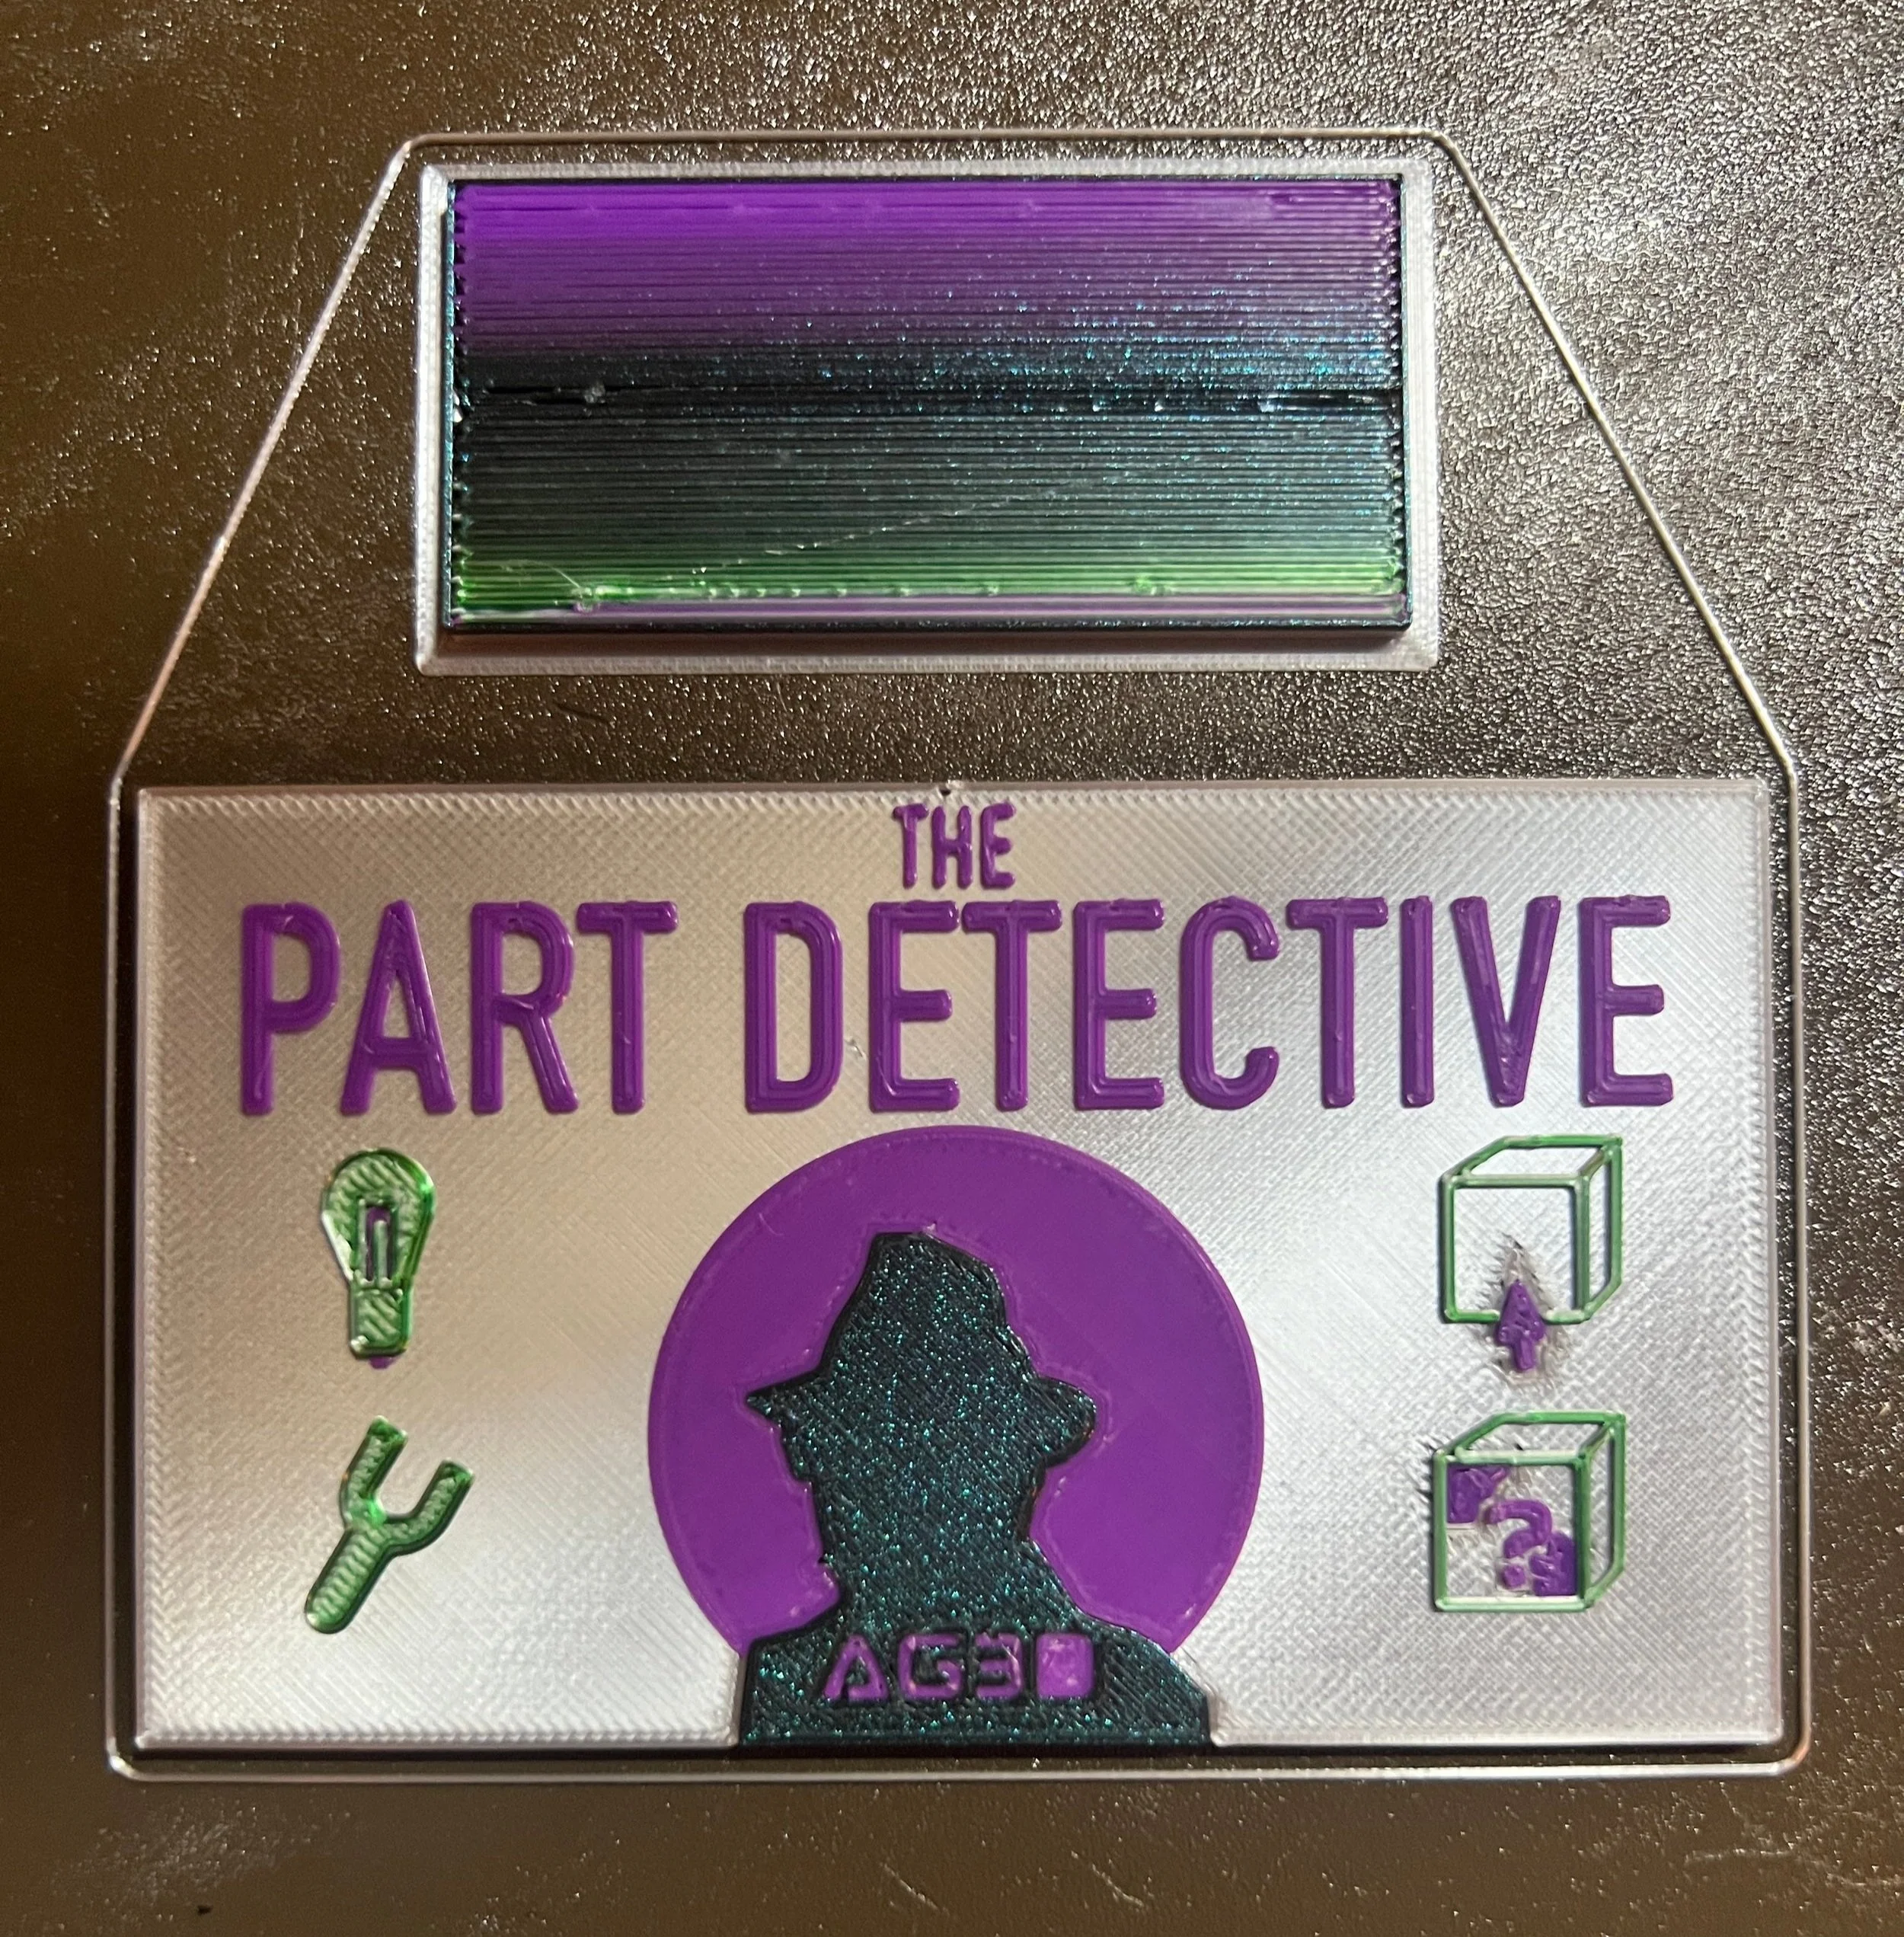
Image of our final 3D Printed Business Card with an embedded NFC Tag inside. When swiped over a smart device, the NFC Tag will bring you to our website ag3d-printing.com! Video example of the magic in action at the end of this post.
1. Introduction
PRODUCT/IDEA DEVELOPMENT WITH 3D PRINTING
Have you ever had an idea for something and wondered “…if I only had the real thing in my hands (i.e. product, tool, item you thought of), we could really do something special!”
Bringing ideas into reality is a real adventure, and most people stop before an idea really gets going and grows into it’s full potential.
In this ‘Part Detective’ case file we’re sharing a great example of how a simple idea can grow into something with real value, that addresses real world issues, all while having the “wow factor” to go with it.
Let’s crack into this closed case file and dive into HOW we made a futuristic 3Dprinted Business card and WHY it could be the last one we ever need! We’ll share our challenges and lessons along the way, and show you the final card by the end!
P.S. Below are Affiliate Links for the Products we used in the Project. I earn commission from qualifying purchases. Any support is appreciated but not required!
THE
PART DETECTIVE

2. THE PART AND THE PROBLEM
THE PART
The Business Card: Something most people have, most collect at meetups and conferences, and almost everyone throws out. While the rest of us end up keeping them in a drawer, never to see the light of day until spring cleaning (maybe).

AI Generated Image (Grok) of the classic Business Card Exchange at a Trade Show. Yes…the AI could not get fingers right.
We all buy them, or maybe the company we work for buys them for us. Some business cards are better than others, but its really about the networking of it all. It’s part of the routine of meeting new people and making connections in the business world (and even life). If you go to more than one conference or meet customers and colleagues more than a few times a year, the business cards add up.
It begs the question: Do we really need paper business cards anymore? And if not, what replaces them?
THE PROBLEM
While business cards made sense for a while, social media and an online presence make the paper business card a sizeable waste of material. A metaphorical middle-man to human connections that almost 100% of the time becomes waste (if not clutter).
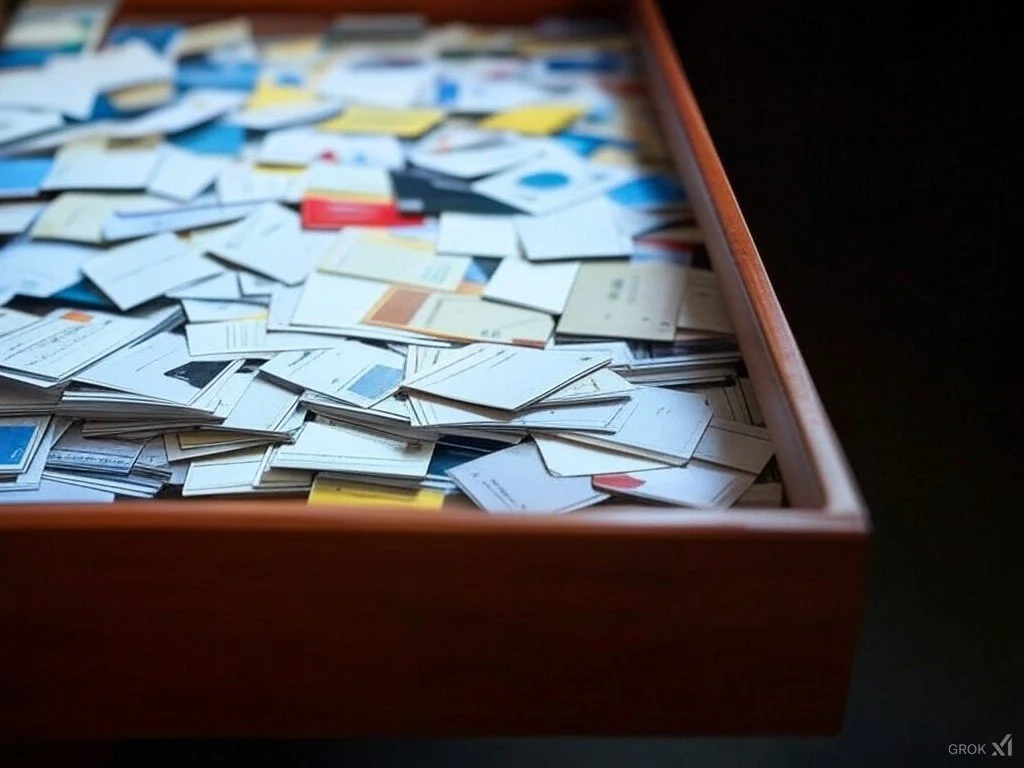
AI Generated Image (Grok) of a desk drawer filled with business cards from all the tradeshows and connections made while at work.
The whole purpose of the business card is to network and share your website, social media account, email, or contact info. It’s about making connections for the future.
CAN WE MAKE THE BUSINESS CARD BETTER?
Business cards are also about first impressions…and “first impressions are,” as they say, “everything”. So can we boost the potential of your first impression to WOW others with a 3D Printed business card?
CAN A 3D PRINTED CARD REDUCE THE WASTE OF NON-RECYCLABLE CARDBOARD AND INK?
CAN WE MAKE THE BUSINESS CARD “SMARTER”?
CAN THAT NETWORKING EXPERIENCE OF SHARING CONTACT INFO BECOME MAGICAL?
Let’s find out!
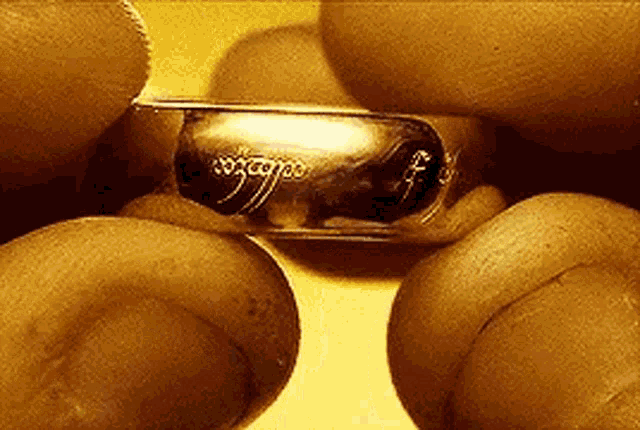
“One ‘Business Card’ to rule them all, One ‘Business Card’ to share direct to device, One ‘Business Card’ to bring them all, and in the darkness no longer waste them.” - Lord Of The NFC Coins: Fellowship of the Coin
3. WHY MAKE THIS PART?
If we’re successful, it would mean you only need 1 business card
Using an NFC tag embedded into the card you can share exactly what you want with your new contact exactly where their attention is: their smartphone.
Potentially reduces the waste of mass producing cards.
Only one business card that you bring with you everywhere.
Reduce the waste and cost of buying 100s of business cards every year or new job/role. Not to mention the hoards of business cards one collect’s over a career.
The One Business Card is somewhat Future-proof: Just rewrite/update the digital destination without needing to remake the business card. If you can read the NFC tag, you can program it.
If it works you could make a GREAT First Impression!
Truly WOW others with a 3Dprinted business card that also digitally interacts with their smartphones! Be unforgettable.
4. CHALLENGES & LESSONS
Context Note: This project coincided with our first year of Multi-Color 3D Printing using our Prusa i3 MK3S+ & MMU2S. While this technology is not that new, it’s still years ahead of most hobbyist 3D printers with one-color devices. Bambu Lab’s systems are very good at this, but the MMU came out first. We are not sponsored by either company, FYI. ' Do your research, and don’t buy a 3D Printer too quickly. You can always email us at AG3Dpartdetective@gmail.com if you need help figuring out what 3D Printer you should buy.
The last note: We upgraded our base model Prusa with the E3D Revo Upgrade for easier nozzle swapping and more consistent heating. There were plenty of firmware changes for heating profiles and material changing operations to make this work effortlessly. Worth the upgrade, but not recommended for first time users. Not a true 1 to 1 comparison of the base model of 3D Printer, but a great example of what a finely tuned custom 3D Printer can do.


This is the Prusa MMU2S, which is the first (imo) fully functioning MMU unit from Prusa. I have really enjoyed learning on this, and understanding how all the mechanics work. I would not recommend purchasing this version if you want to buy, get the latest from Prusa themselves or get a Bambu Lab!
5 LESSONS FROM
THIS PART CASE
LESSON 1
The Number of Tool-changes Matter for Part Success in Multi-Color!
Control the Major Variable: Anything you can do to reduce your total tool-changes helps you get more part success.
Multi-color 3D Printing Advice: Anything under 150 tool changes is more successful and less expensive. We observed that extruder gear debris build up, shape of filament tips between loading, and extrusion back-pressure leads to more stops and manual intervention required. Less tool changes, less failures can happen.
Some of the constantly-moving hardware (idler) that moves the 5 filament locations is made of 3D printed plastic, and not metal.
There are metal screws & nuts to fixture, but plastic isn’t that solid. It’s a natural thing for moving parts of a machine to vibrate. This leads to things getting “loose” over time with use, needing some TLC & calibration every 150 hours of 3D Printing or so.
Long story short: Every 150 hours, do some checks on the moving parts to make sure they are still secure.
Don’t get me wrong, every 3D Printer is different and you could just plow through and get lucky with no failures. But it’s not very scalable and adds approximately x8 more work when things go wrong when compared to the normal one-color 3D Printing. So be cautious.
When we started the Business Card Part Development Project we used 5 colors on our original design. Eventually we settled for 3 colors in the final version because:
Using 2 less colors naturally created less tool changes, so less problems.
Three colors were enough to make a great looking business card, even though my natural tendency was “FULL COLOR, ALL THE COLORS”.
ACE VENTURA DESIGN V0 | 3D PRINT 1
Our first attempt at the ‘Ace Ventura’ Design taught us alot about tool changes. Also, having a human face (my own) requires at least three colors (skin tone, white eye balls, hair color. Four colors if you want eye-color that is different than hair color).
This left me with only 2 colors, one for the card background (silver) and another for the accent color (purple).
This approach ended up very limiting and I knew I wanted a change on the next design to make those secondary texts pop and so my hair didn’t blend with the circle.
LESSON 2
PETG is a great material…but not for this.
The project using a full array of colored PETG filament. PETG is a great material, but it is very hard to color change 3-5 different filament colors without some kind of stringing or stoppage to deal with the color change.
With consistently dried filament and all colors from the same supplier, you can control most of the variations from environments and blend differences (i.e. everyone has their own blend of PLA, or PETG, etc.). Controlling the blends can also reduce your “manual intervention” time.
This is something the Bambu Lab infrastructure does automatically by tuning their own material & colors. Stratasys, a well-known manufacturer of industrial 3D Printing technology did this (and continues to do this) successfully. But Bambu Lab 3D Printers are more within the everyday person’s budget.
It’s Material Science at the end of the day. So with Bambu Lab’s solution you’re as close to “click & print” as you’re going to get today. However, it’s something us Prusa MMU users need to be mindful of when mixing the melt zone of our nozzle with multiple materials and colors.
ACE VENTURA DESIGN V1 - 3D PRINT 2
This is the original ‘Ace Ventura’ design using the 250 micron nozzle or “ultra fine resolution”. 3D Printed using a 0.1mm layer height. All five colors were used and with a few manual interventions we were successful. This was the start of my understanding for how challenging PETG is, and how important reducing tool changes is to succeeding.
We also learned that the individual letters/shapes could be designed as separate objects instead of one part with many surfaces, and then manually coloring those surfaces in Prusa Slicer.
Quality Note: The silver top surface of the card has that wavy look to it. This is due to the flow rate of the smaller 250 micron nozzle. We could have tuned this, but it wasn’t worth the extra time.
ACE VENTURA DESIGN V2 - 3D PRINT 3
Here we used the same model and switched to the 400 micron nozzle and “standard resolution”. We didn’t have to manually intervene for the 3D print to succeed and we changed the color scheme a little.
The top layers of the silver background were more smooth and even with the standard 400 micron nozzle.
The major downside was the original design had my glasses that were sized for the 250 micron nozzle, not the 400 micron nozzle. You can see the black glasses frames disappear into the skin tone because it is too thin. This meant it was back to the drawing board for a new, optimized 400 micron nozzle.


LESSON 3
Even White-Colored filament of the same brand and material will run differently, because of the additive used to make it white.
White PETG/PLA tends to be more stringy and requires cooler melting temperatures to compensate for the additive.
For us, lowering the nozzle temperature to reduce stringing didn’t work. The temperature was still stringing at the bottom of the melting temperature range (even with active filament drying). This caused a lot of jamming and the filament just didn’t have enough heat to melt properly while tool changing. We also had the part cooling fans at 100% and we still had stringing.
As luck would have it, we found the perfect substitute. We were using a “natural” PETG in another project, with no added coloring. No color dyes meant it was more “food safe” because it can be thrown in the dishwasher after use. Because PETG can handle heat better than PLA, it won’t warp.
This ‘natural’ filament was swapped in for the white and it solved the temperature difference (and stringing) issue! Below are examples of the white filament versus the natural filament. To me, you can barely tell the difference in color.
Example of white PETG filament on a project that was 3D Printed in Multi-color before we started this project. You can see the stringing of white throughout the project. This was evident even with a controlled drybox and using the same brand of PETG.
Example of a natural PETG which was chosen for another project which required food-contact and the need to be put in the dishwasher. Natural PETG would accomplish this, and you can see the complete lack of stringing on a part. This part is also more complex than the other image with stringing, which you could expect more stringing from here.
LESSON 4
Use a More Forgiving Material & Simplify the Variables
In the end, even though PETG was a great material, we chose PLA for two reasons:
That’s what I had. PLA was the material I had in stock and it made a good color pallet (you wouldn’t want to mix PLA & PETG in one part like this. You could, but you’d be ruining your free time with problems).
After being tortured by the White PETG issue, we wanted to use a more forgiving material like PLA. All the colors chosen had the same melting temperature range. This meant more consistent printing with profiles and less 3D Printing problems. Again, kudos to Bambu Lab’s developers for tuning their own materials so well with their machine. Those of us that like “pain & suffering” choose to tune our own machines that way. The results are great, but it’s always a challenge.
We Moved From the Ace Ventura Design to the Dick Tracy Design and from PETG to PLA
DICK TRACY DESIGN V1 - 3D PRINT 4
This was the first attempt at the 400 micron nozzle ‘Dick Tracy’ design. I loved the lettering, but felt the Part Detective shadow, circle, and shapes were too small.
DICK TRACY DESIGN V2 - 3D PRINT 5
This was the second attempt at the 400 micron nozzle ‘Dick Tracy’ design. I liked the size of the Part Detective shadow, circle, and shapes.
Unfortunately, “The Part Detective” lettering was now too small and its very easy to confuse it with “The Fart Detective”, which is a much different profession. Back to the drawing board.
LESSON 5
Make Sure to Enjoy the Process | Design Heavy Project was Both Fun and Functional.
It was more Art than it was Science, at first. The original idea, thanks to my partner, was an Ace Ventura theme since I have the crazy hair and also a little eccentric and weird.
When I 3D Printed this card for the first time, the grin on my face was so wide that I think my jaw hurt. It was the very first time my face, not to mention characterized, was in color on anything 3D Printed. I had a moment.
It also was so eye-catching in person and the design fit the theme perfectly, just like the movie. After some time with it, I decided that the color scheme needed to be tuned and the sizes of the shapes and letters should be adjusted. Thank you to my partner for encouraging me and coming up with the theme of the Part Detective. It fits me so well, and she knows me well!
MAKING PROGRESS
It was time to decide on the next design we’ll iterate. While many defects improved and the 400 micron nozzle design was working well, something about the color scheme and letter-sizing just wasn’t right.
This was the perfect opportunity to “step back” and review everything we’ve accomplished so far before getting into the weeds again. So we recorded this Part Design Review video. It’s a stream-of-conscious show & tell of this exact moment in the development process - worth a watch (and a like)!
PROJECT FEEDBACK
After posting this Design Review video to our Youtube page we got plenty of comments online, as well as good feedback in person. After taking that all in and looking for what we could improve, we moved to the final version of the design and closer to closing this case.
Below is a collection of comments we got after sharing the video.


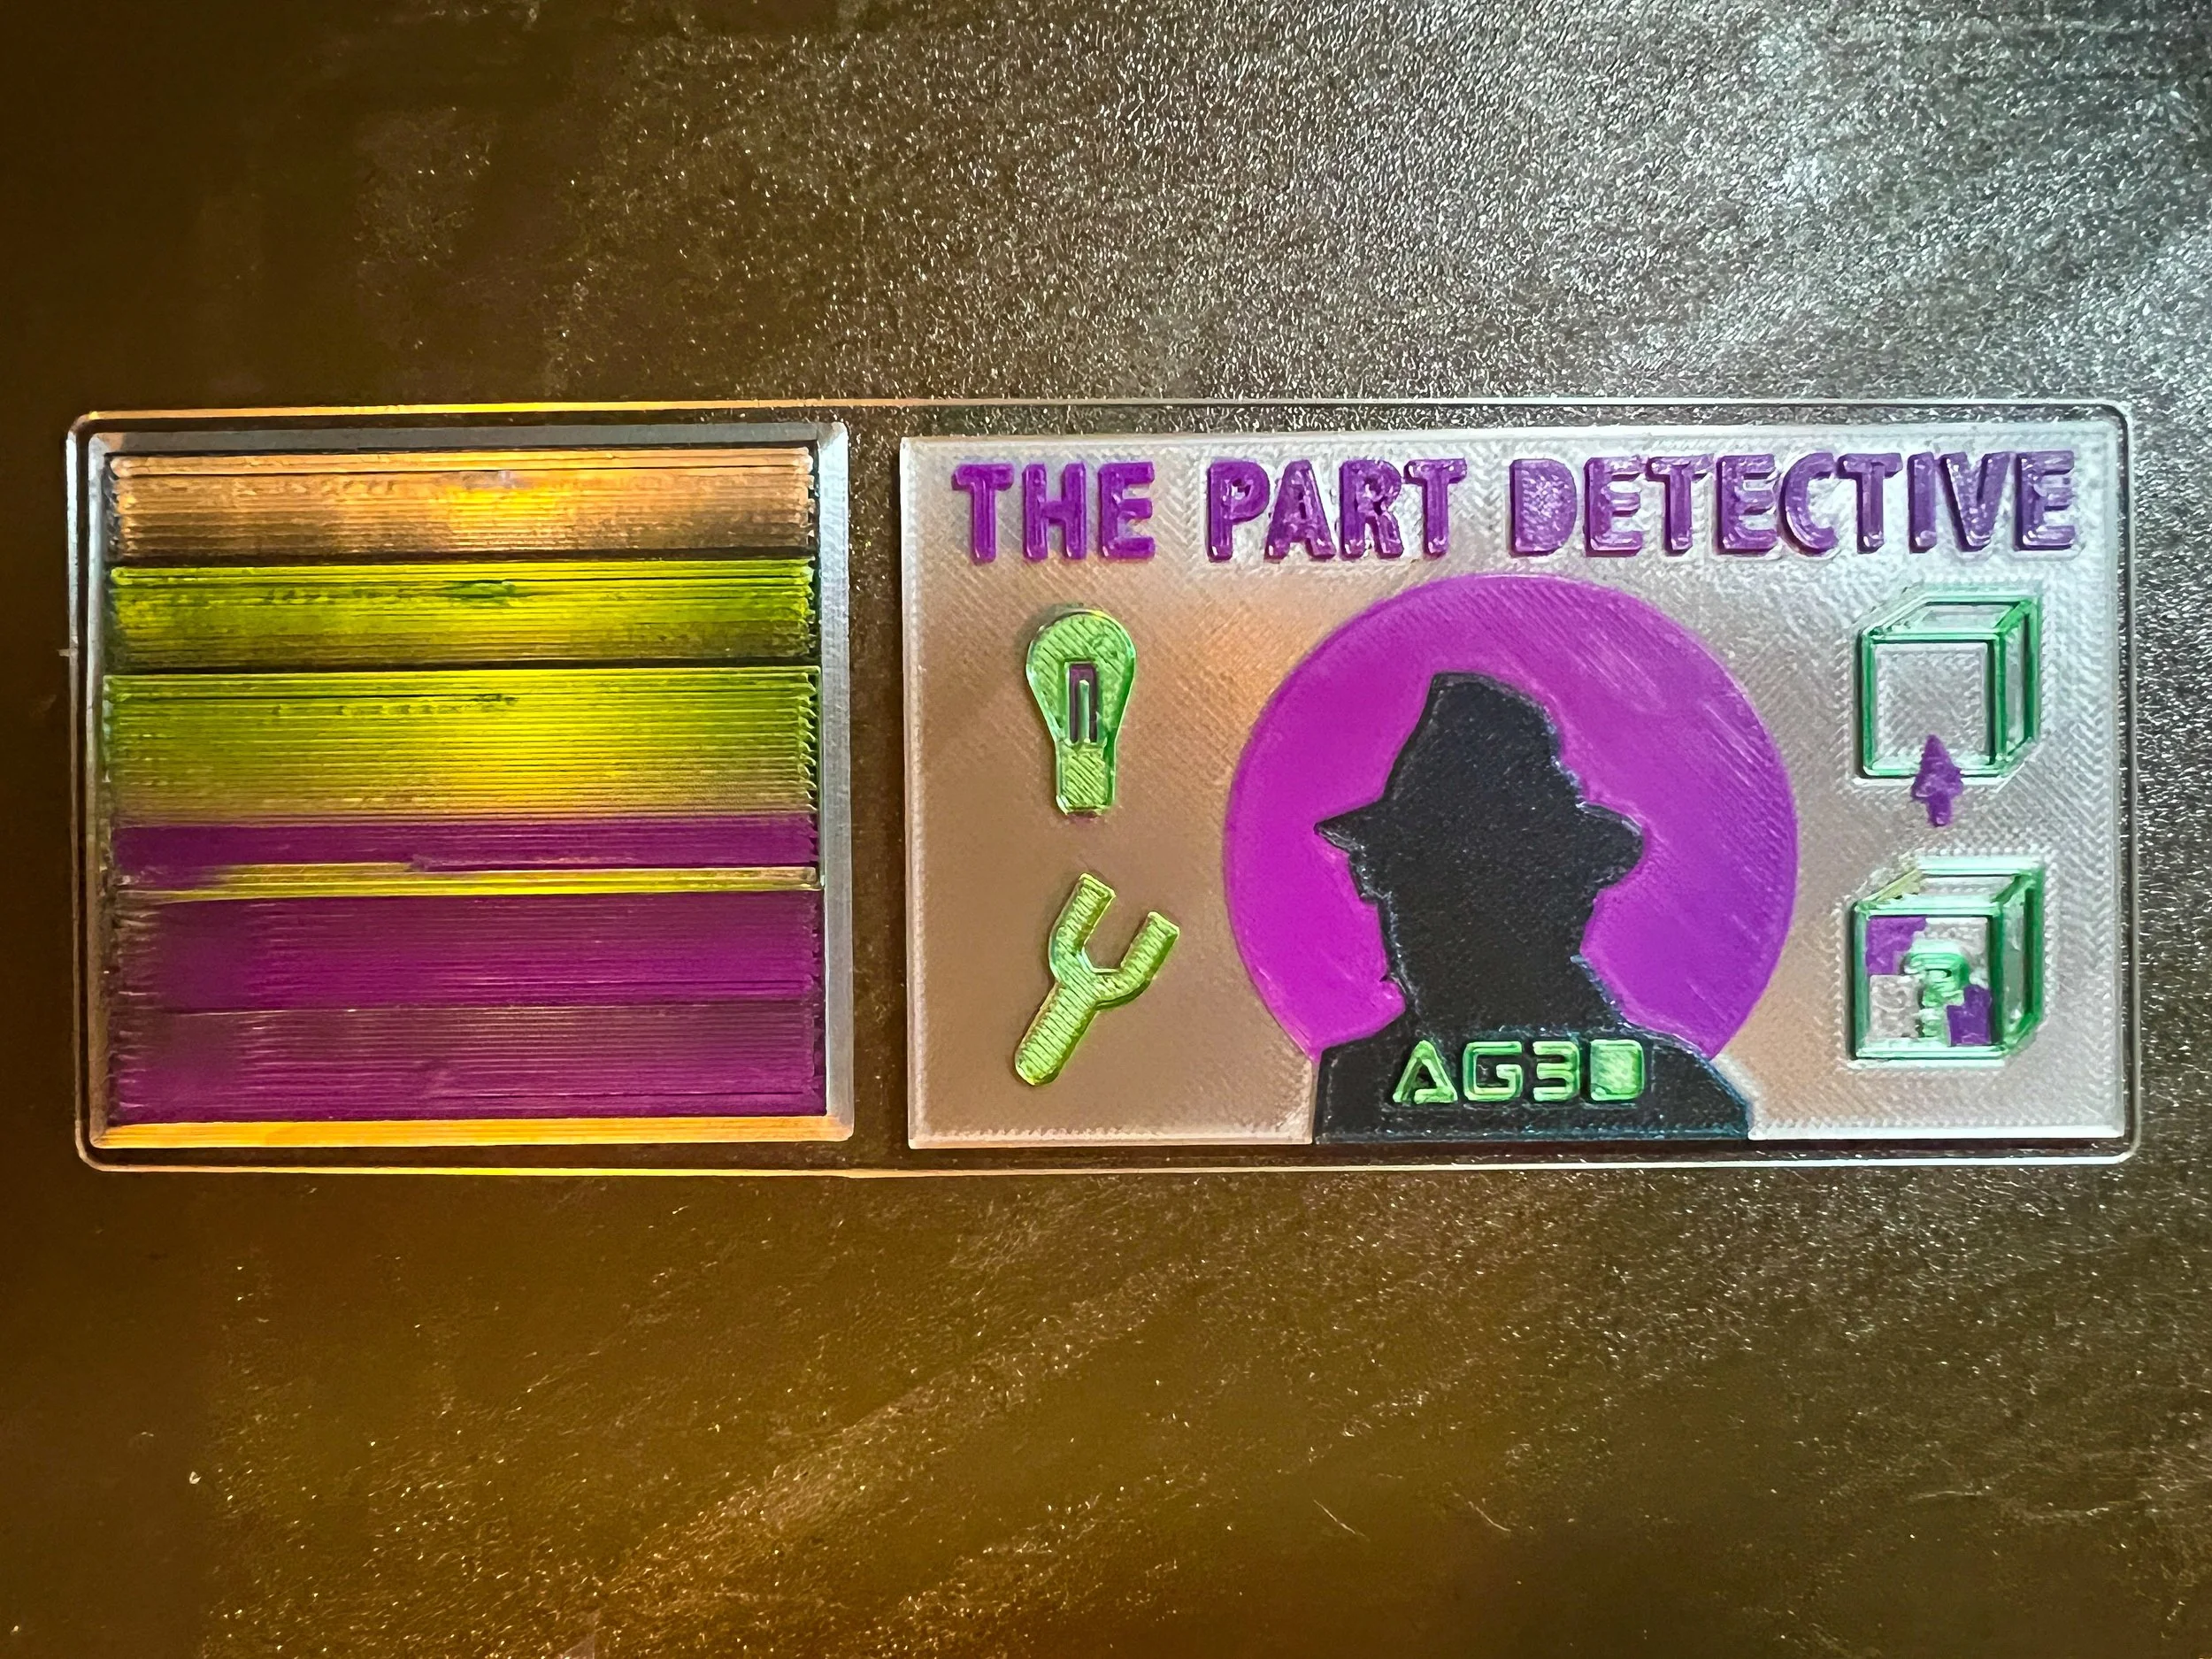
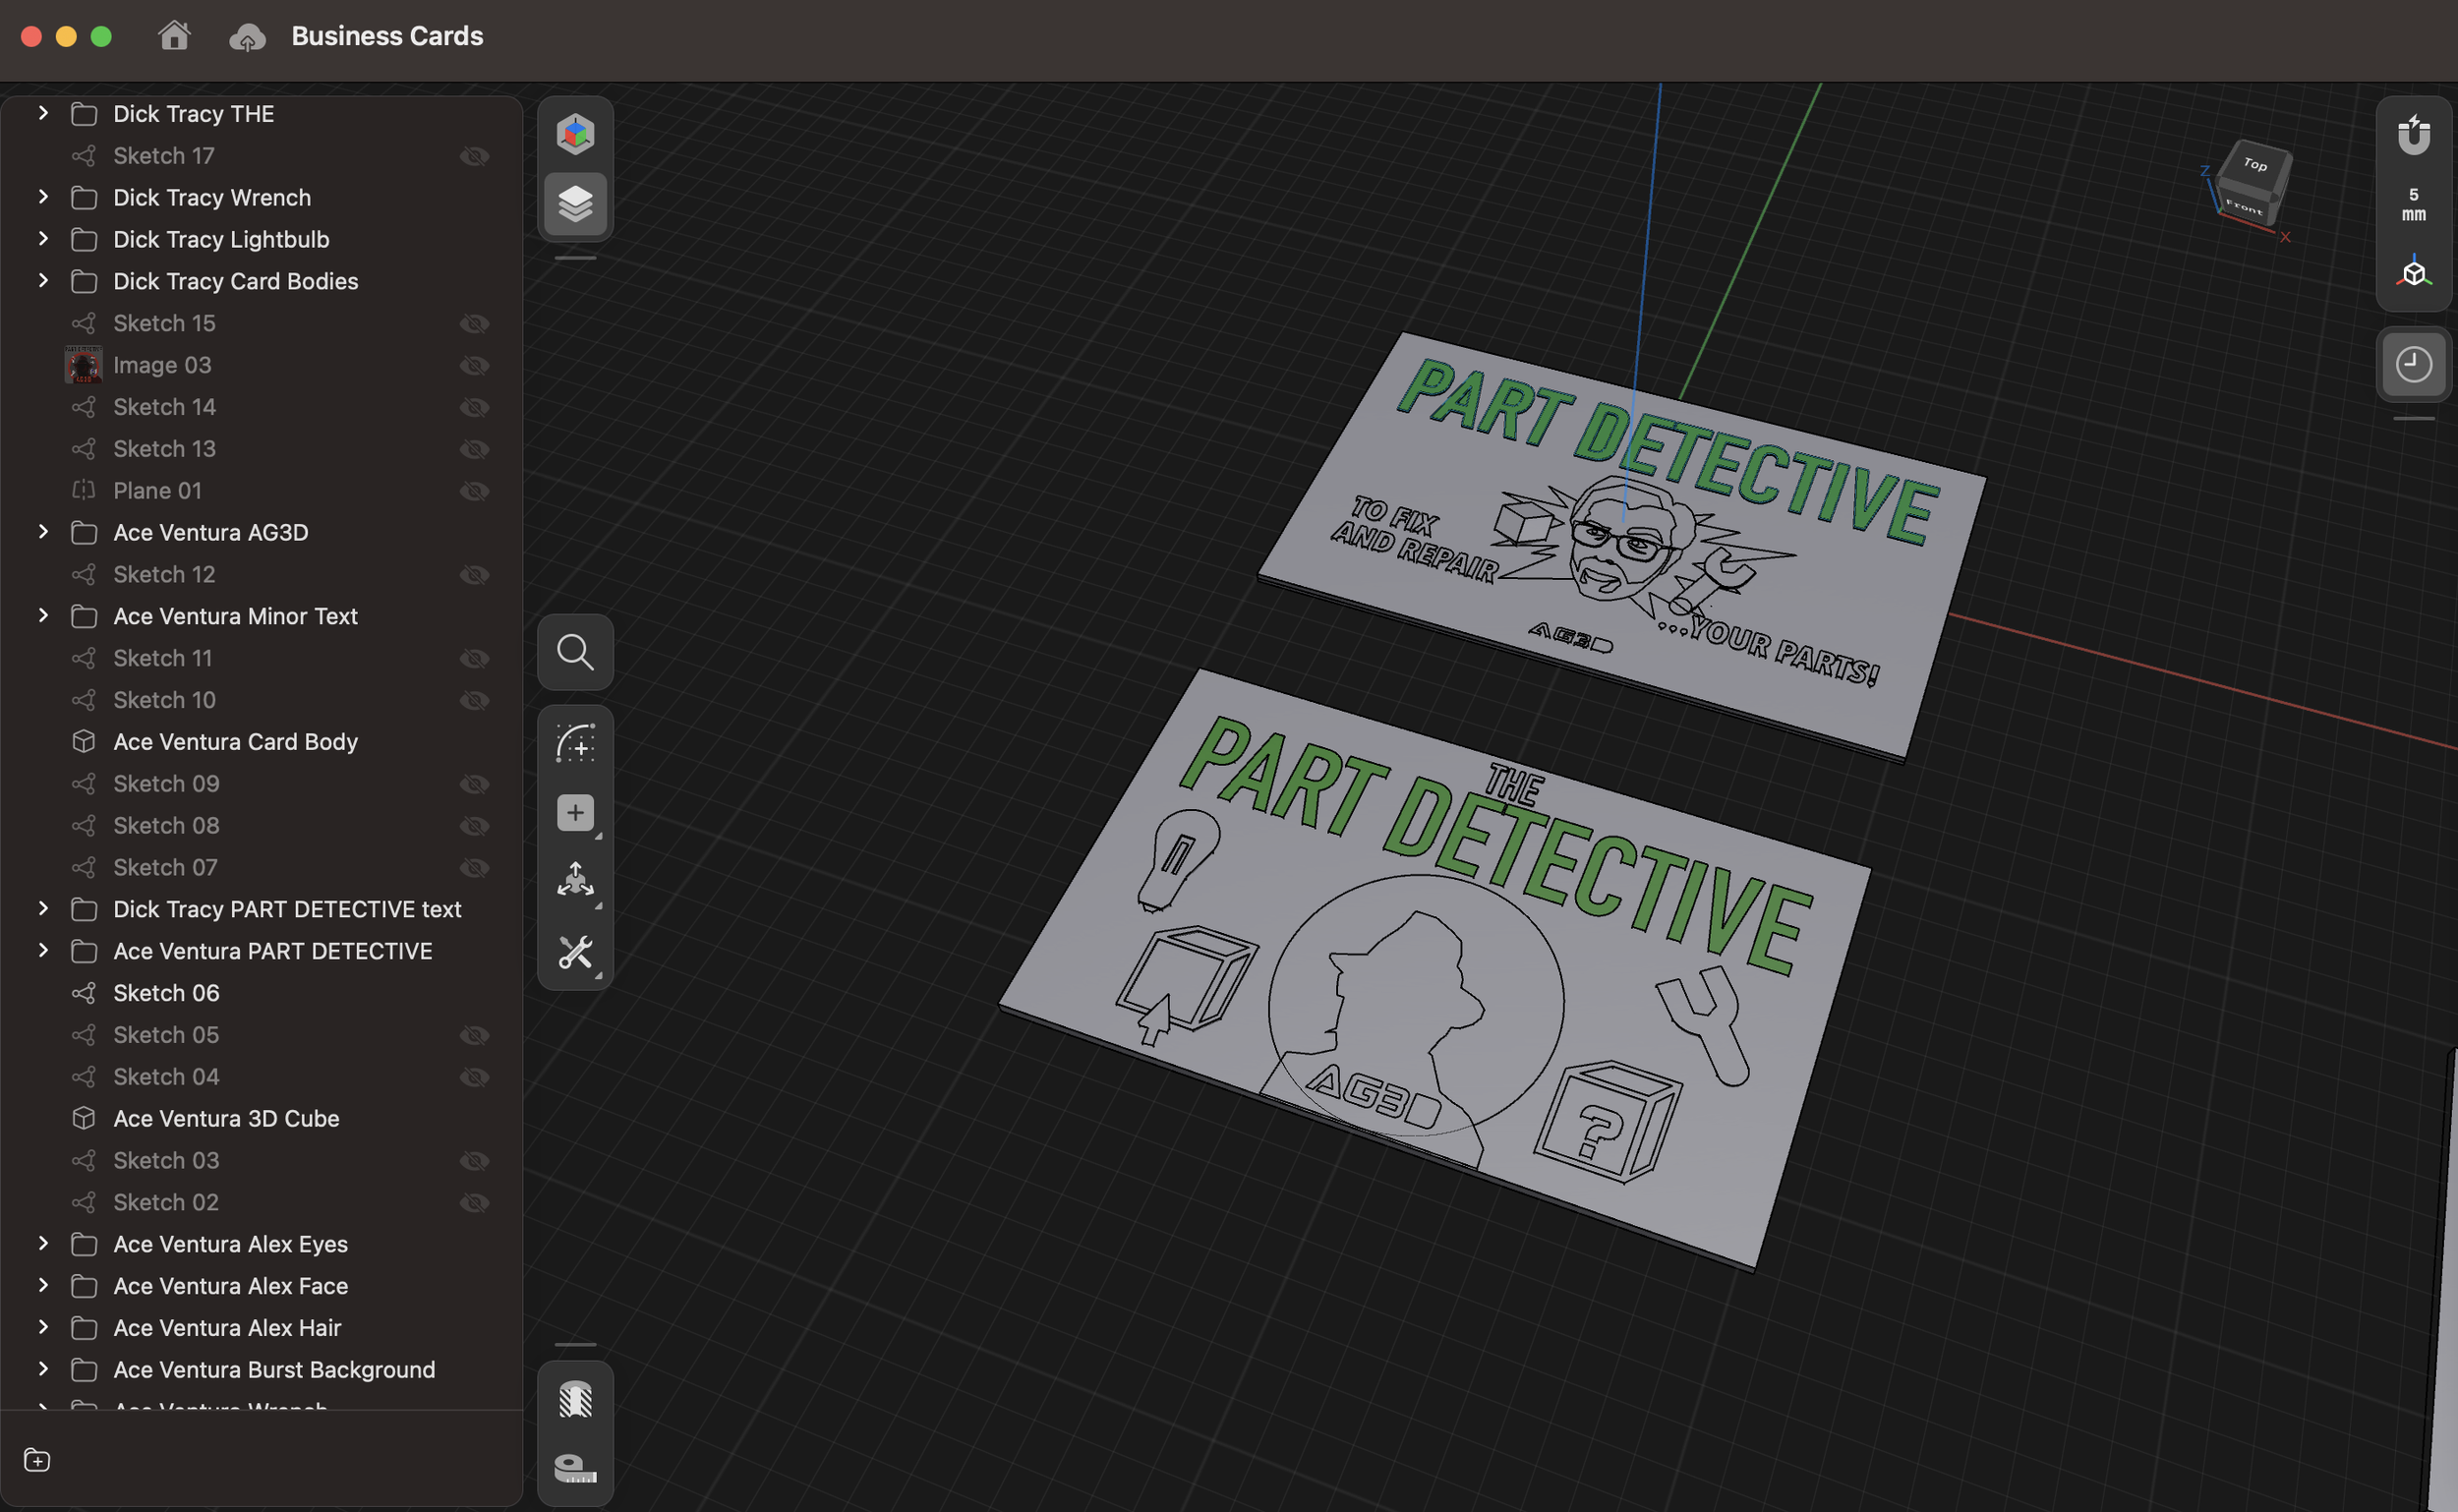
DICK TRACY DESIGN V3 - 3D PRINT 6
The final version of the Business Card (with embedded NFC tag!). We brought back the larger lettering and spread out the the shapes to fill the empty space.
NFC Tag Programming
Sometimes…you just “go for it”.
I bought the chips before researching how to program them, which may not have been efficient - but we made it work. We could smell in the air that the case was coming to a close. So after one night with a glass of brown liquor, we impulse bought some inexpensive but perfectly sized NFC tags. It was time to add some techno-magic to this business card.
We found there are a lot of apps out there to program, but not all chips are the same.
With some more research we found some Brands sold full solutions (chips and apps/tools to program). Instead, we had a random-NFC-tag-amazon-buy and found free iPhone App that got the job done.
The application we used was NFC Reader Tools, which was free and had a lot of extra features.
The ‘write tool’ was easy enough, and it got the job done. I did not explore the rest of the application in depth, but there’s a lot there.
This NFC Chip was 0.4mm thick which is exactly two layers for the 3D Print using the 400 micron nozzle. We measured the coin and designed the cylindrical hole for the NFC coin in the part.
We programmed a pause in the GCode to allow us to insert the coin before continuing to 3D Print over it.
The NFC tag embedding with 3D Printing was successful on the first try without issue (video below). If the machine was printing faster I would be worried about an embedded item shifting during a fast move (jerk) and then getting in the way, impacting the nozzle. Luckily, we were fine here.
NOTE: The NFC Tag could probably be programmed after embedding into the 3D Print as well, which could make programming them easier in bulk. I didn’t know if the heat of 3D Printing would kill it so I embedded first, asked questions later.

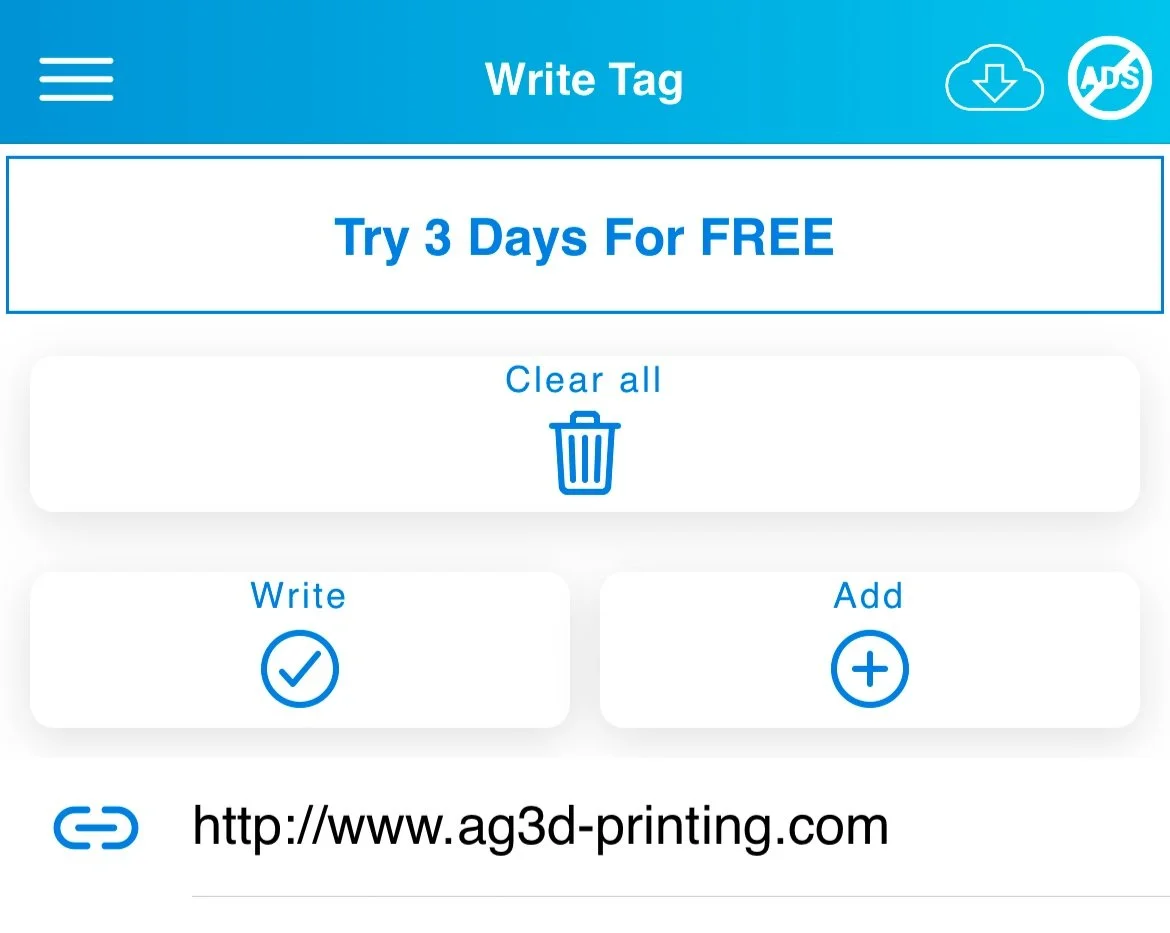
The write NFC tag section. Very simple.
We have no affiliation with this application, just sharing what we used for your own reference in case you decide to try it out.
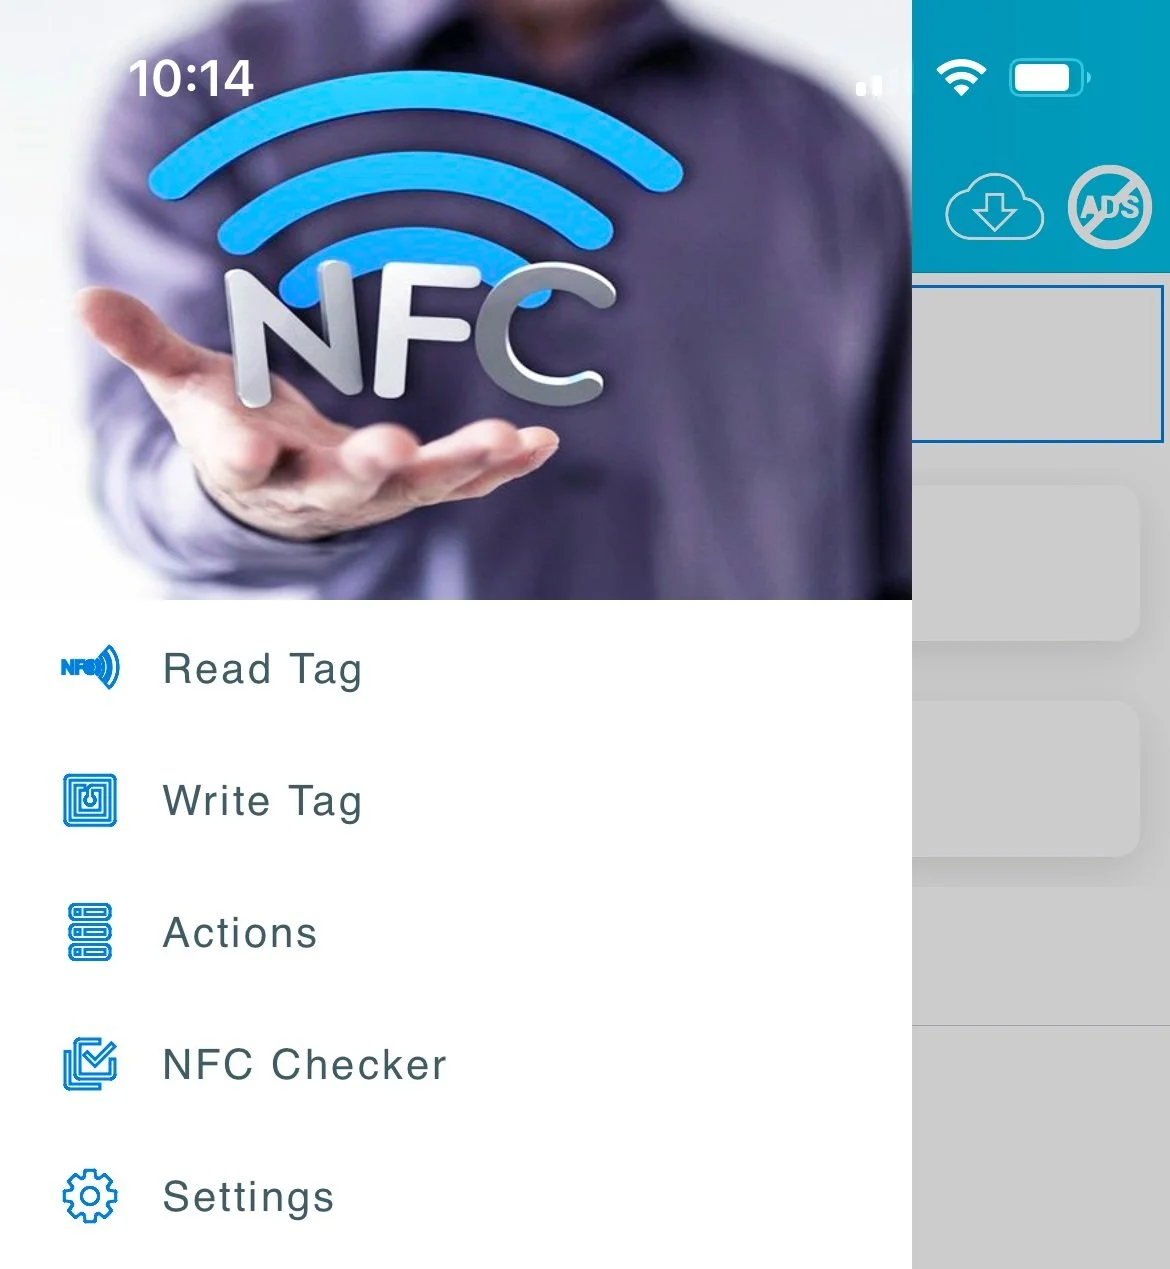
Plenty of features to use with NFC tags
This video is from us placing and embedding the NFC coin in the 3D Printed Business Card mid-print after modifying the gcode.
FINAL INSIGHTS:
A Design-Heavy Solution was NEEDED to Make This Work!
Part of what makes this project so fun is the creativity of designing in color and developing it over time.
We found that the most successful way to make multi-color parts today is to design individual parts for each color.
That way the entire “object” could be 3D Printed in that color, inside the part. This meant fuller more defined colors. You can use the Prusa Slicer to color it manually by surface, but most of the time the coloring isn’t as good.
We could organize folders of objects/colors and name them “Text Lettering” and “Shapes” and “Detective Silhouette” which helped with changes later on.
If you can stay organized, this method is great. If organization is a struggle, a project like this can get away from you, fast. So discipline is needed.
While designing each color as a new part is challenging, for my skill set (15 years of experience) it’s just another day in the office. Designing around the limitations of ANY manufacturing process is the most powerful way to succeed with challenging 3D Prints.
If you’re not a CAD designer, I could see this project being challenging, frustrating, and time consuming. But the Part Detective is always here if you need that - just reach out!
A screenshot of our workspace inside Shapr3D, which is our current daily design software. We’ve used Fusion 360, Solidworks, Onshape, etc. and they are all more of less the same. We chose Sharp3D because of the functionality of going from computer (mouse + keyboard) to iPad & Apple Pencil. It allows us to design on the go, anywhere we are.
You can see the grouping of the models themselves on the left, with naming assigned to the folders. This made it easier to go from one revision to the next, by simply draging a copy of the parts we liked to the next design.
Using the 250 and 400 micron nozzles for each design brought so much insight to the business card creation.
Using both of these at the start of the creative process helped me understand what the design needed to be to be for efficiency AND to have eye-catching design. We were able to test multiple designs and influences from cartoonish, to realistic, to right on brand.
5. The Cost of Bringing This Part Into Reality
To put things into perspective, this was an idea development project that had no direct goal or path other than to have fun and see where we could go with a 3D Printed multi-color business card.
NOTE: This is not a full representation of all costs associated with the project. But it is an honest take on the costs involved for our shop and setup. It’s meant for educational purposes.
We own our 3D printers and paid them off years ago so our costs can be lower. We also have a deep understanding of our wear & tear expenses from use.
We only used filament we already owned and had in inventory. We didn’t purchase new materials.
Not to mention, we could leverage our 15 years of 3D Design skills to fill the gap on any problems we found along the way.
With all that said, here is a break down of the costs involved:
Plastic Filament:
We 3D Printed 5 business cards, and had 1 failure. With purge towers, failures, and actual cards included, we used roughly 350g of filament total, from 10 different colors and materials (PLA & PETG)
Cost of Filament = Total Filament (g) Used x Average Spool Cost
(350g / (1000g/10)) x $25 = $87.50
Note: I consider a multi-material job as more expensive than a single color print, as it would cause the inventory to run out faster and need more restocking. Using this many colors is definitely more expensive and was eating away at the inventory.
NFC Programmable Tags:
We purchased the NFC Tags on Amazon and only used one of them in this project.
The NFC Reader Tools application we chose was free for 3 Days so we spent $0 on this.
Cost of NFC Tags:
$13.59/50 NFC tags
or
$0.27/NFC Tag
Running 3D Printer:
With 6 jobs run, at roughly 5 hours each we can estimate that the operational cost was as follows:
Cost of Operating 3D Printer:
($5/Job) + (30 hours * $0.05/hr) = $31.50
Note: this includes costs for wear and tear on the system, as well as electricity costs for me personally.
This is also very unique to everyone’s setup/machine/style so it may not be the same for everyone.
This doesn’t include costs of calibrating & tuning the materials for running the highest quality 3D Printing.
CAD Design:
We designed 2 different styles of the card, with 3 ‘Ace Ventura’ versions and 3 ‘Dick Tracy’ versions. In total, this amounted to 4 hours of design across several weeks.
We started with a solid design plan which was scalable for future revisions which saved a lot of time with each revision, instead of starting from scratch.Cost of Designing:
$60/hr from the Part Detective
4 Hours of Design over the project = $240
One of the best things about having CAD Designing as a skillset as a maker - you can do this part yourself! So for us, the cost here was my own time and curiosity.
TOTAL THEORETICAL IDEA DEVELOPMENT COST: $372.59
ACTUAL MONETARY COST TO DEVELOP FOR US:
$132.59
Think about this cost as if you are someone testing an idea for a business before “going all in”.
Our iterative approach helped us learn so much about what it takes to 3D print a smart business card. It went from a possibility to reality in a matter of weeks as a side project.
If you consider $372.59 as “product research & development” to know if the idea is worth pursuing, that is a very inexpensive way to start a company (or cut your losses).
But if you want to learn this yourself and have this ability at home/in the office, 3D Printing can help you develop ideas at insanely low costs to yourself.
6. How “The Part Detective” Made It Easier
The Part Detective is focused on making our customer’s parts more successful with 3D printing. We focus on the part, beginning with design for manufacturing first or at least using it to help solve the challenges at hand. Not to mention 7 years of deep technical knowledge across various 3D Printing Technologies.
This project is a great example of how we can help YOU bring an idea into reality. It’s also a great way for a burgeoning entrepreneur or small business owner to develop a product early; with low cost, reasonable turnaround times, and a physical product in your hands by the end of the day.
If you are looking for a full solution to bringing an idea into reality, or even just some help figuring out why your parts aren’t working - reach out to us! Get the conversation started and then book 30 minutes with us when you’re ready.
More Part Detective Choices that helped the project:
Choosing a thin/short part in full color saves a lot of time 3D printing.
You can use 3 or more colors without worrying about the added time per print because there aren’t that many layers!
It also means you can iterate multiple times per day, leaving you in a more developed place with your design/product by the end of the week.
We have a Deep, Functional Understanding of the Physics of Extruding Filament to troubleshoot issues and make fast decisions to move the project forward.
Education doesn’t happen quickly. At the Part Detective we’ve been 3D printing for almost 8 years with many technologies and materials.
We’ve done the dirty work to understand the science/engineering so you don’t have to. AND you can leverage our experience to figure out your problem, without spending weeks/months learning the mechanics/physics to get successful parts.
CALL TO ACTION
Ready to turn your ideas into reality?
Contact “The Part Detective” to start your next custom project or explore more of our work on Instagram.
7. Case Closed: The Final Part
DICK TRACY DESIGN V3 - 3D PRINT 5
Video of us showcasing the final 3D Printed “Smart” Business Card and showcasing how the NFC Card Reading works on our phone! You can put the chip on the back or front of the phone up top, where the reader is. Modern Smart Phones have these built in, but some older ones may not.
The final part is really something magical. I still get a kick out of swiping the card over my phone and seeing the pop up for our website.
Knowing that there is a piece of technology embedded inside something I 3D Printed also gets me excited. You really wouldn’t know its in there unless I told you.
We will be bringing this with us at trade shows, on business trips, and anytime I get to meet new professionals. I’ll make sure to report back how it goes here later.
It’s adventures in 3D Printing like this that really make me optimistic about a future where 3D Printing at home is as common as paper-inkjet 2D Printing and Personal Computers of today.
The potential of ideas and solutions that the next generations could come up with is massive. This smart business card is just one of the many examples of a future we are working towards.
Final Thoughts:
There is a deeper programming ability for these NFC chips I want to invest time into.
Is there an NFC chip/application combo that makes this alert customizable?
Can you instantly open the website/link without requiring someone to press the alert?
How much is this full solution? Is the value-add worth the price increase?
Hacking, like any technology, is possible. I wouldn’t be putting NFC chips into things in public or installed in an exhibit/trade show piece. I think the threat level is as serious as QR Codes which has a non-zero chance of getting hacked (meaning, it can happen). But honestly, I need to learn more about it.
The back of the card is completely blank at the moment.
We could use an etched build plate to add some flare and color (more on this concept in the future as we just picked some of these build plates up).
We could also add a QR-Code on this back side so that in the case that the NFC chip battery dies, the QR-code can still be used.
It would also give optionality, in case you run into someone who refuses to use NFC chip readers.
You could also add other contact info on the back in color as well. But for the sake of my sanity, I left that out-of-scope for this project so we could move on, finish this case, and go on to the next one.
Using the same brand for a full-color pallet will make 3D Printing easier and ideally higher quality. That would add even more of a WOW factor to the card itself.
This quality for our final part is MORE THAN ADEQUATE for people new to 3D Printing and to make an impression.
Could the part quality be better? Sure. I try not to get caught up in the “snobbiness” of 3D Printing purists. Inside the 3D Printing industry there is a bubble of pure perfection for part quality. It’s a bubble that can drive expensive & wasteful efforts to tune and calibrate systems/parts to some unending level of perfection. When in reality, at the end of the day it’s what the customer wants/expects, NOT what the 3D Printing Operators/Engineers want/expect. This concept could be a blog post/video all on it’s own.
We’ve only just scratched the surface for the potential of programmable NFC tags embedded in a 3D Printed part.
Already we’re looking to implement a programmable NFC tag into a product we already have in our etsy shop to add even more value and make a magical experience.
One of our friends online Ezra Fuller is a photographer (just one of his many talents). He has been selling his prints on WhatNot and sharing about the process.
These photography prints, while breathtaking and beautiful, also have an interesting collectibility to them: an NFC tag that provides the GPS location of where the image was taken is on the back of the them.
Ezra went above and beyond and sourced an NFC tag that would last for years and years. That way the people who purchase his prints can always check the location in the print. Or, they could also go on adventures to be exactly where the photograph was taken.
I absolutely LOVED Ezra’s application for NFC tags and my head is still spinning in brainstorms from it. You should also check out Ezra’s work on Substack and on WhatNot to pick up one of his prints. He’s incredibly talented and I love seeing him get his work out there, on top of all the great work he does for Veefriends.
WANT A SMART BUSINESS CARD LIKE THIS?
We’re ready to make these for anyone who wants one. We think it would be great for:
An individual looking to have an amazing networking tool
A business looking to outfit their team at a trade show with smart business cards to make networking fun!
Someone looking to reduce their waste-potential with business cards.
Starting at $75 for a single programmed business card and as low as $20-35/ea for bulk order, depending on how many you order.
Includes a 15 minute session one-on-one video session with the Part Detective to go over the design before we start making!
Fill out this form to get the conversation started! No commitment required, just gathering interest with the form below.
Give Us Feedback!
Before we wrap up and put this closed Part Detective Case back in storage, we want YOU to tell us how well we addressed the problems for traditional paper business cards:
Did we make the business card better?
Do you think this smart business card would boost your first impression to WOW others?
Do you think this 3D Printed business card can reduce the waste inherant with non-recyclable cardboard and ink?
Did we make the business card “smarter”?
Could this smart business card make the networking experience a more magical interaction?

This is the Part Detective, signing off until the next 3D Printing mystery needs solving!
Let us know in the comments or email us at AG3Dpartdetective@gmail.com
Until next time, stay curious and good luck 3D Printing!