Halloween Costume - Tony Stark Wearable Arc Reactor from IronMan 2
Here is a project I have been trying to finish for over a year and finally took time this week to complete it! For Halloween this year I am going as Tony Stark (from Iron Man 2). I designed the chest arc reactor screenshots from the movie and 3D printed the parts in Carbon Fiber PLA to make it lighter. To attach the part to the shirt I used two parts and some simple 5/8" screws.
This was a fun project but it was a busy week and now I'm exhausted! Hope you enjoy your Halloween!
SOLDERING PRINT BED ON PRUSA I3 MK2
3D PRINTER MAINTENANCE:
My Prusa i3 MK2 no longer was able to heat up the print bed so I could 3D print upgrade parts for the MK2.5S. This work-horse of a machine has brought many ideas into reality for a lot of our customers. Now we're 3D printing parts for a 3D printer to become another 3D printer!
But first, I had to repair the broken wire causing the failed heated bed that happened from shear over-use. This is a maintenance repair for the printer, not a defect. Something that most people new to 3D printing (including myself) find out - 3D printers need work, especially if you want to make them work all the time. I enjoy repairing my 3D printers when I can, so I soldered the wire back and calibrated the printer. I am very new to soldering. If you have any tips please share them in the comments! Would love to learn!
Then, we printed the first of the replacement parts after running a Z-calibration and now we're able to 3D print for our customers again! Phew!
Using a lighter to remove stringing from parts | AG3D Testing | 3D Printing Tips

From my experience 3D printing, there are many times when you 3D print a part but it requires some extra work to clean it up afterwards. You can refine your machine and tweak settings to get it to print perfectly, but I’ve found it more efficient to make sure a model(s) 3D prints properly and then find new techniques to save time and thus money. So when I heard from a friend that you could use a lighter to clean up the stringing on my 3D printed parts, a lightbulb went off in my head - let’s try that this weekend! So here we are…
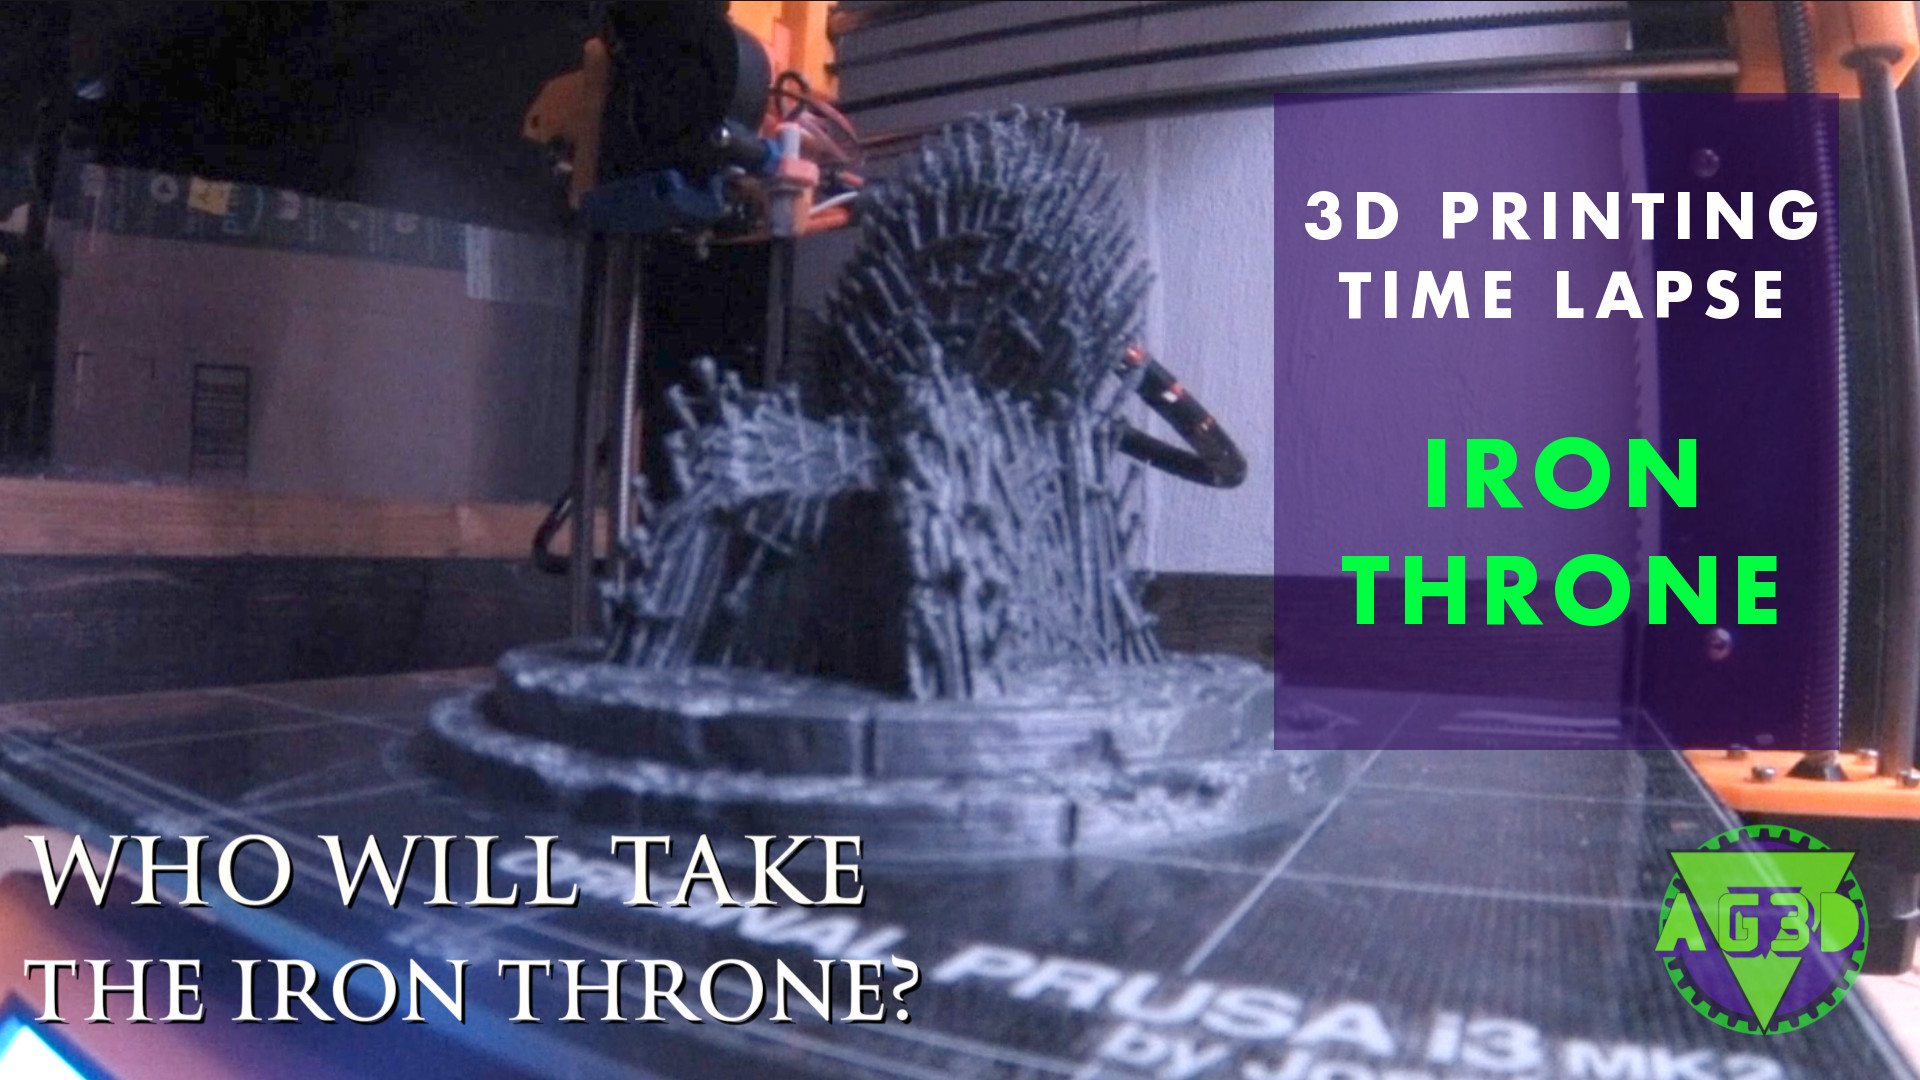
3D Printing the Iron Throne | Game of Thrones Finale
Preparing for the MASSIVE Creality CR-10 S5 3D Printer
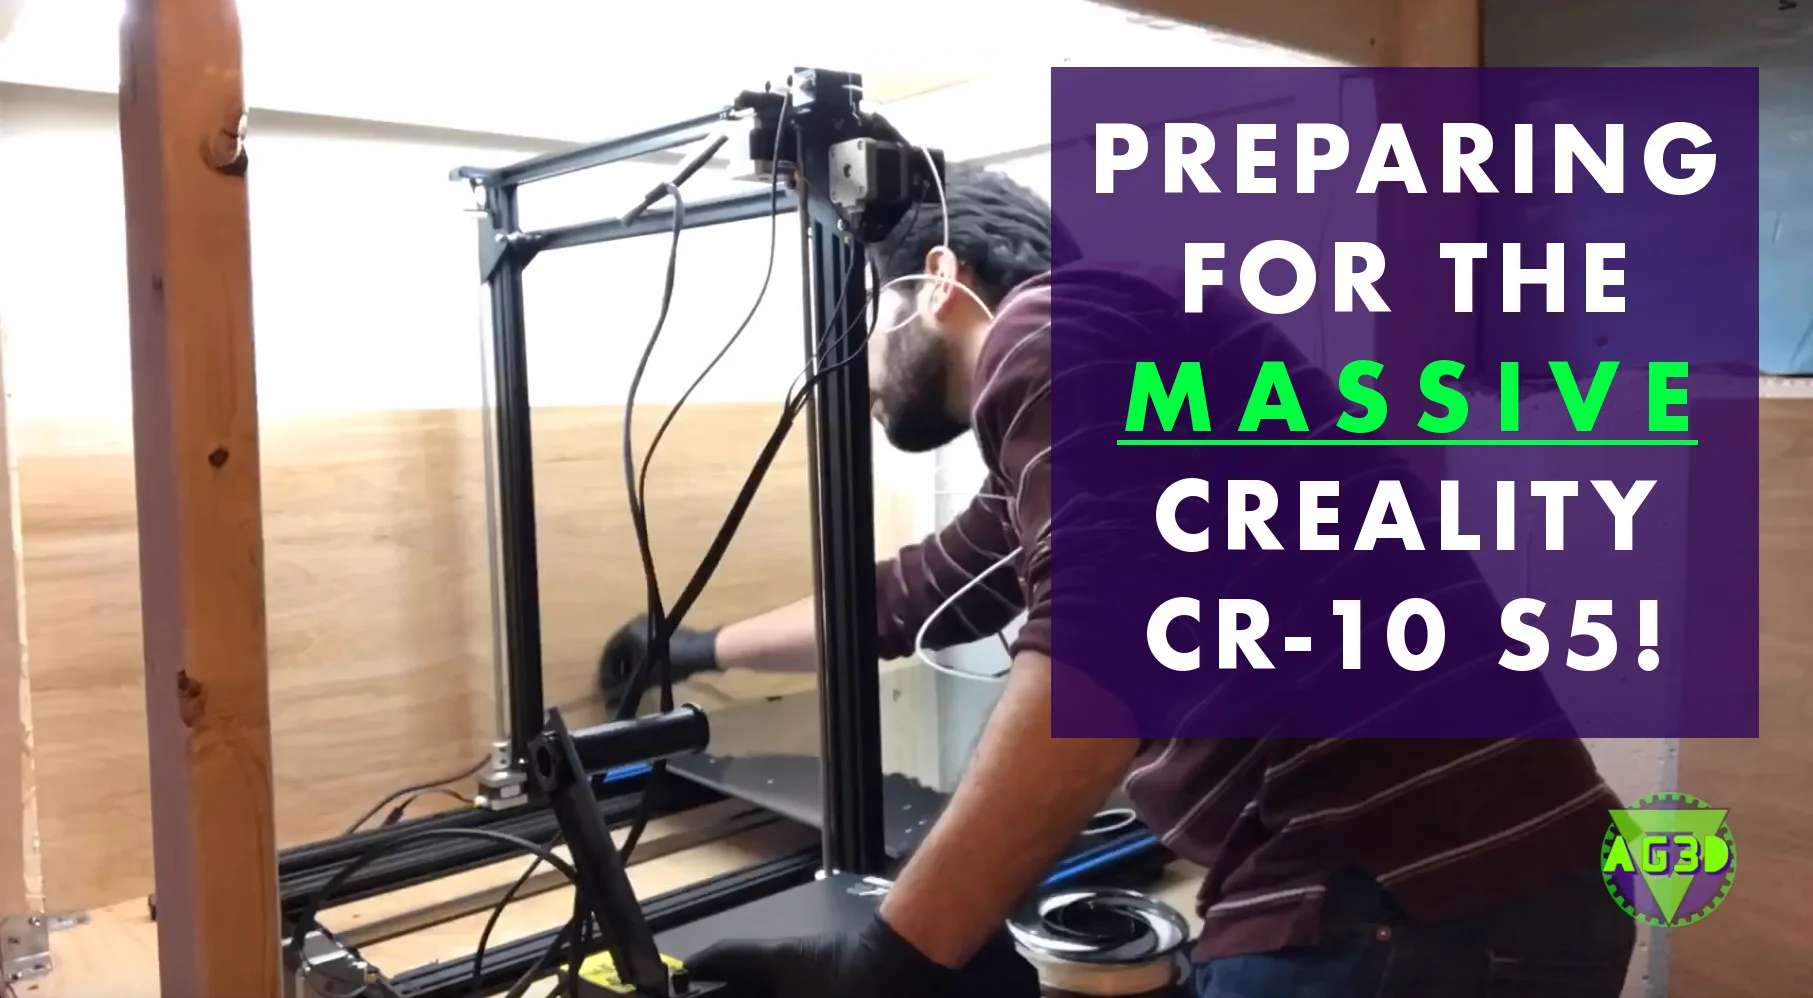
We just got our latest addition to our 3D Printer Fleet - the Creality CR-10 S5! This is the most MASSIVE 3D printer I have ever used, never mind assembled. I set up the camera to show the process of putting this giant 3D printer together and getting filament to extrude from the nozzle! Big first steps.
3D Print FAIL time lapse THAT KEEPS ON GOING!

Here's an interesting time-lapse mistake I caught on camera that actually shows anyone new to 3D printing what it looks like. Even the failure shows you how 3D printing works layer by layer. We were trying to 3D print all of the blades for the GoT Jon Snow Sword at once - clearly, not ready for that just yet.
3D Printed Vices for Game of Thrones Jon Snow Sword Longclaw
This is a work in progress that I created to help me finish epoxy bonding my own version of plrmaker7's Jon Snow Longclaw blade model on thingiverse (Thing: 1150877). I had two halves of a sword and no easy way to allow the blade to bond fully in one straight piece. I made these vices to help me bond the blade properly. They are available for download on thingiverse (Thing: 3607763)
https://www.thingiverse.com/thing:3607763
Each vice makes use of hardware to use as vice:
x2 1/4-20 Hex Bolts 2-1/2"
x2 1/4-20 Nuts
x4 1/4 washers
These can be hand tightened when used to create solid bonding vice.
I printed these with Blue and Clear PETG filament on the Prusa i3 MK2, using 0.2mm layer height and 20% infill. Blade vices are labeled for each mating part in plrmaker7's models.
Will continue to improve, making it simple to create the full sword on your own with vices for each blade. Ideally, will be possible on one flat surface and you could complete in one bonding epoxy session. A second, third, fourth, pair of hands for the cosplay blacksmith in you.
WORK IN PROGRESS: Feel free to leave recommendations for how this can be improved!